
Application Control with Microsoft AppLocker
deviceTRUST can dynamically configure the Microsoft AppLocker configuration (click here for more details) to allow or deny access to applications, scripts, modern apps or installer packages (.msi) for a user based on the context of the remote endpoint. deviceTRUST can also gracefully terminate applications that should not be running.
- Check Requirements to use AppLocker for a list of supported operating systems.
We will guide you step-by-step to enable AppLocker and use it to control access to a business application (for demonstration purposes, we will use Notepad++) depending upon whether the remote device is licensed. We will perform the following steps:
- Step 1: Enable Microsoft AppLocker
- Step 2: Install the deviceTRUST Console
- Step 3: Create a ‘Licensed For Business Application’ Context
- Step 4: Test the ‘Licensed For Business Application’ Context
- Step 5: Create an ‘Application Control For Business Application’ Action
- Step 6: Test the ‘Application Control For Business Application’ Action
- Step 7: Gracefully Terminating Business Application on Reconnect
- Step 8: Test the Graceful Termination of Business Application on Reconnect
Step 1: Enable Microsoft AppLocker
- Launch either the Local Policy Editor or edit a Group Policy Object using your Group Policy management tools.
- Navigate to
COMPUTER CONFIGURATION\POLICIES\WINDOWS SETTINGS\APPLICATION CONTROL POLICIES\APPLOCKER(orCOMPUTER CONFIGURATION\WINDOWS SETTINGS\APPLICATION CONTROL POLICIES\APPLOCKERwhen using the Local Policy Editor). - Enable and configure the default Microsoft AppLocker rules by right clicking on
EXECUTABLE RULES,WINDOWS INSTALLER RULES,SCRIPT RULESandPACKAGED APP RULESnodes and selectingCREATE DEFAULT RULES. - Ensure that the
APPLICATION IDENTITYservice is started.
Step 2: Install the deviceTRUST Console
To configure the deviceTRUST Host using the Local Policy Editor, the deviceTRUST Console must be installed on the same machine as the deviceTRUST Host. Alternatively, configuration can be deployed using a Group Policy Object (GPO) by installing the deviceTRUST Console on the same machine as your Group Policy management tools. Follow the steps in the section Installing the Console to complete the installation.
The deviceTRUST Console is available within the Group Policy management tools at COMPUTER CONFIGURATION\POLICIES\DEVICETRUST CONSOLE (or COMPUTER CONFIGURATION\DEVICETRUST CONSOLE when using the Local Policy Editor).
Step 3: Create a ‘Licensed For Business Application’ Context
We will design a new context named Licensed for Business Application to have the value True whenever the hardware serial number of the remote device matches a predefined list, otherwise it will have the value False.
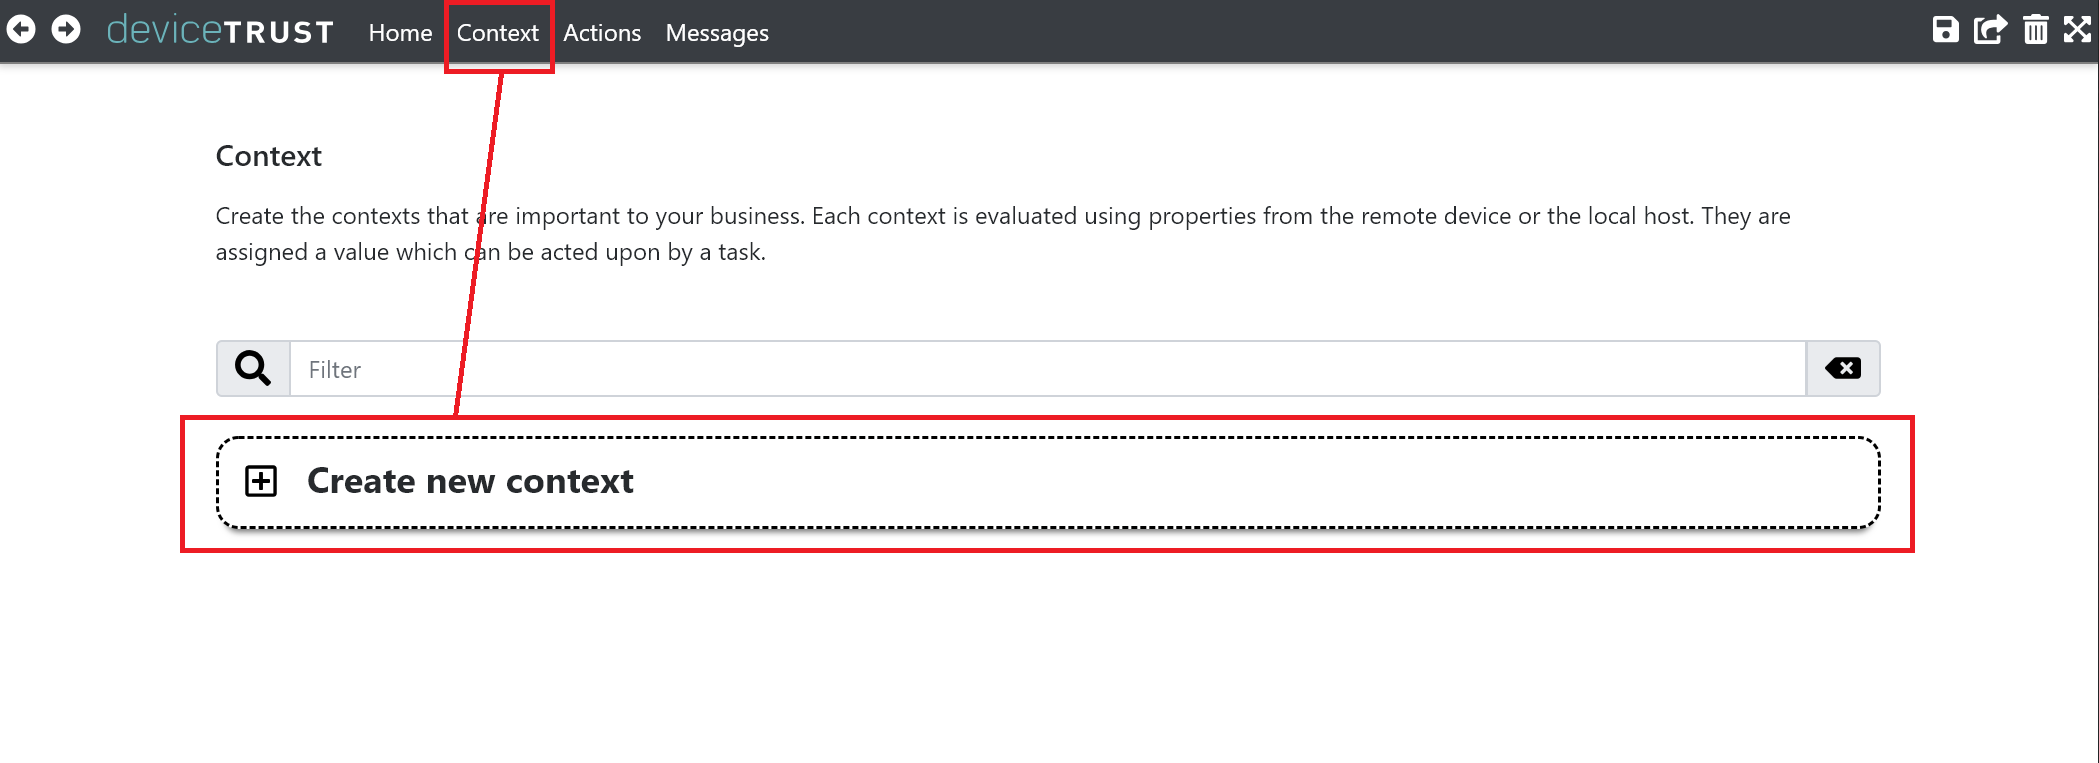
Within the deviceTRUST Console, click on Context within the navigation bar, and then click on Create new context.
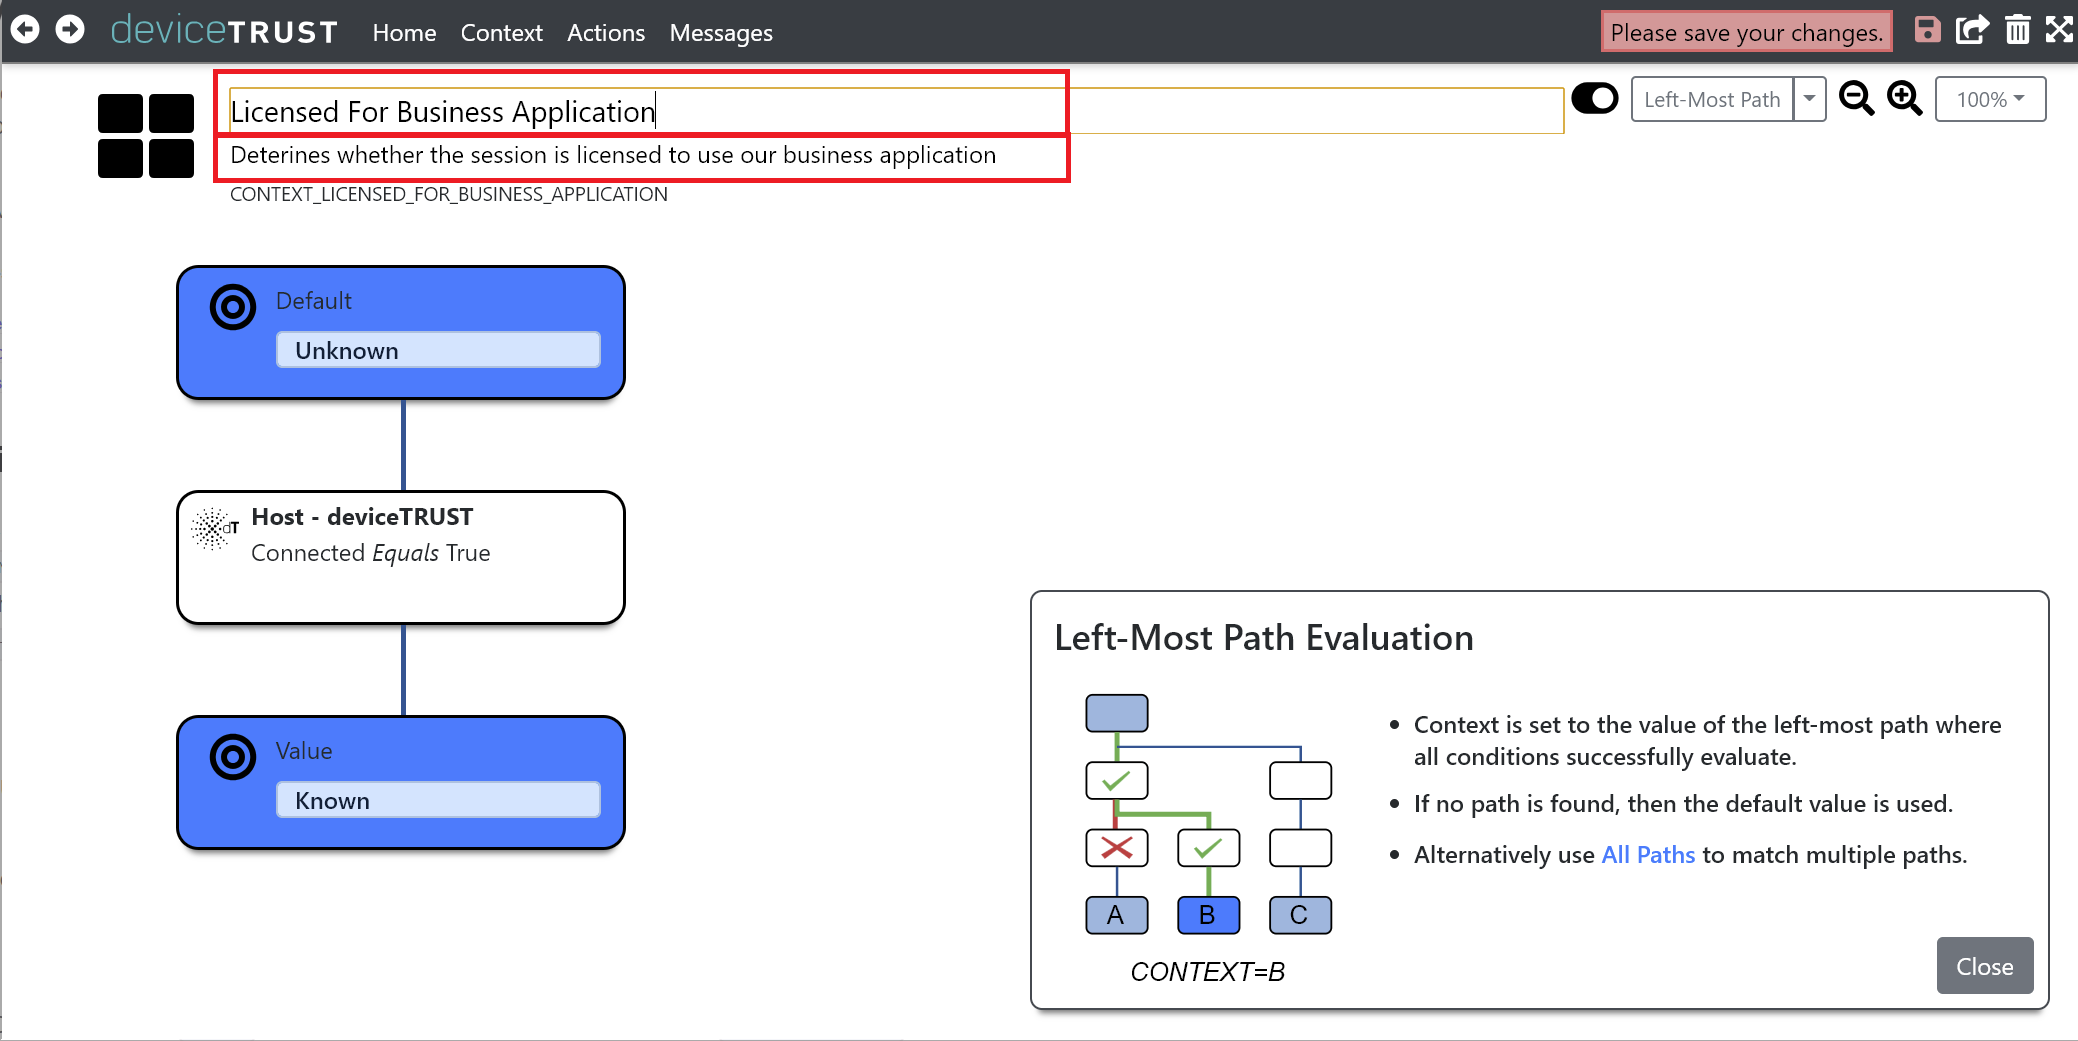
Name the context Licensed For Business Application and provide a description.
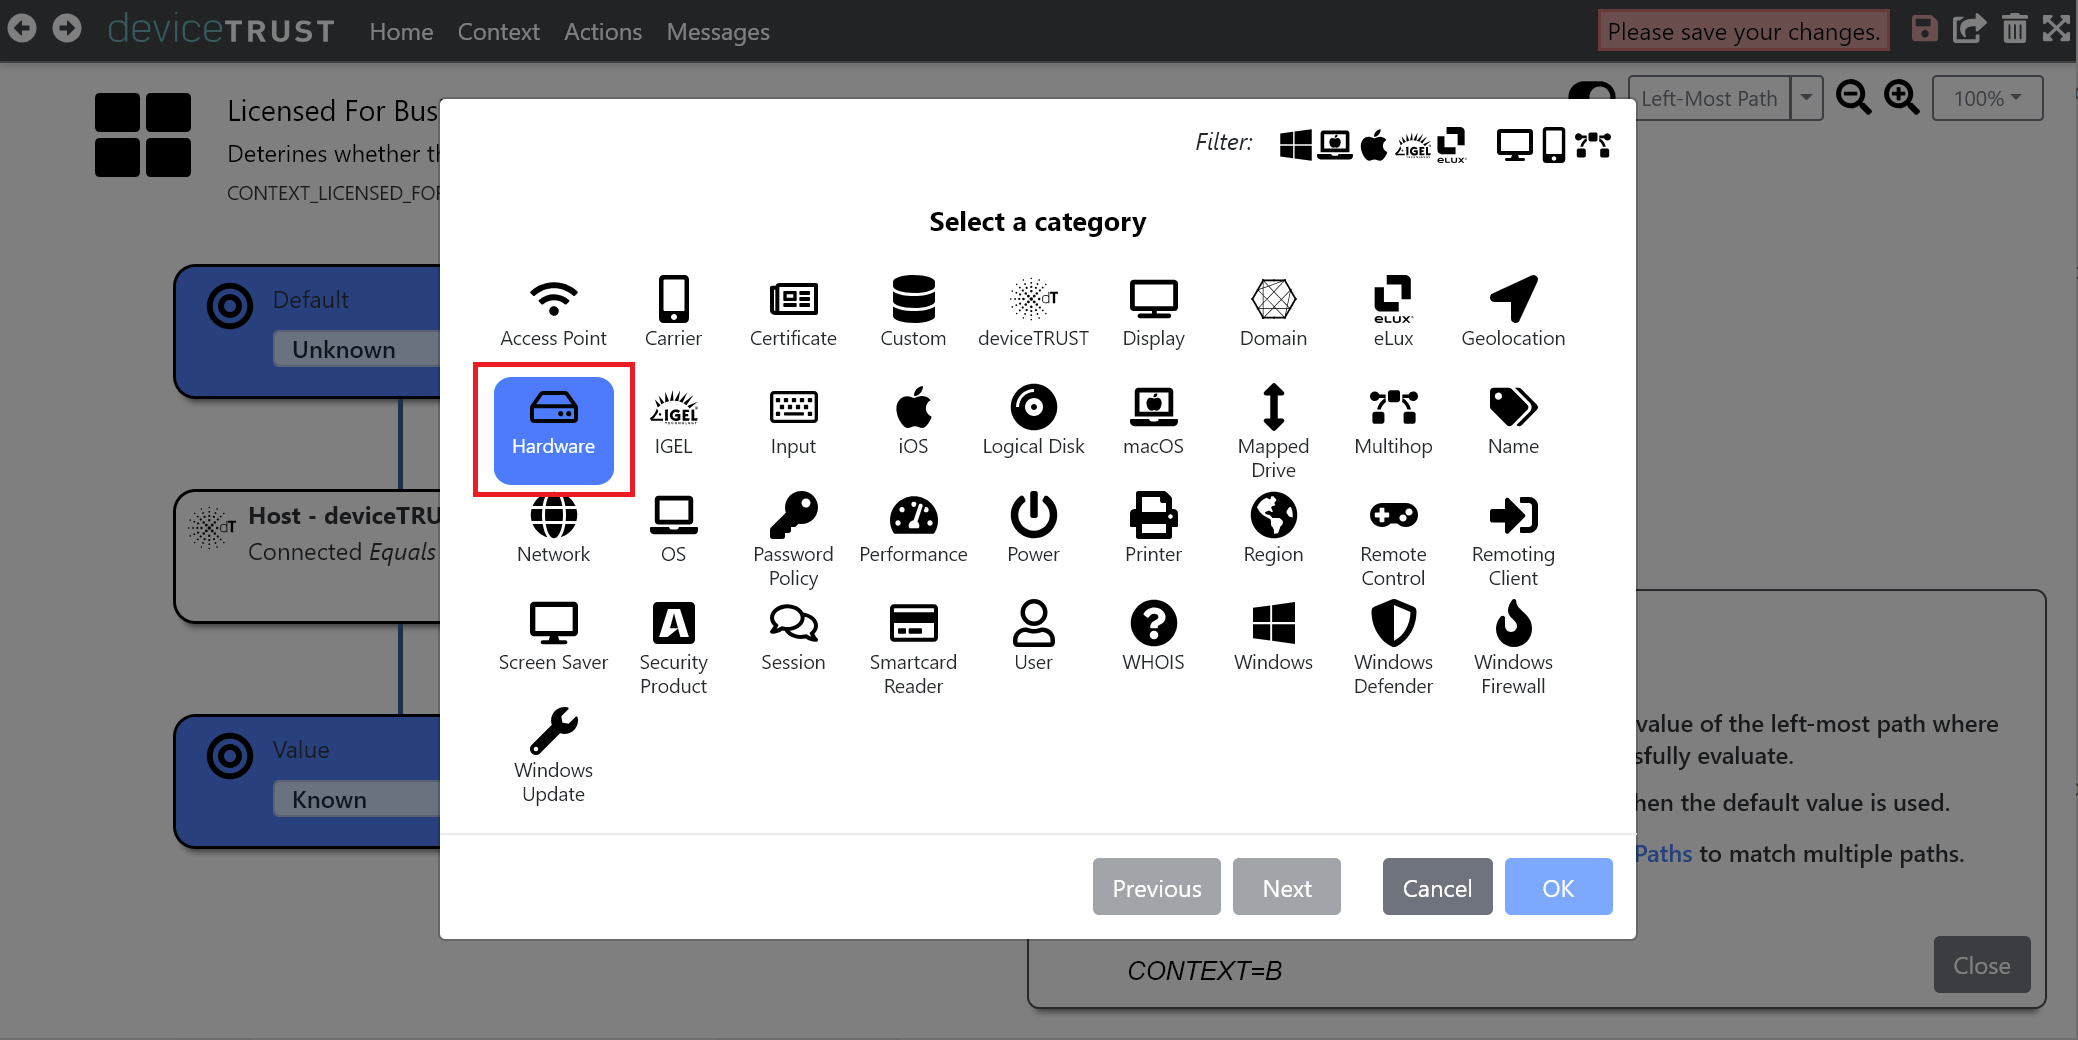
Underneath the condition HOST - DEVICETRUST - CONNECTED EQUALS TRUE, click on the + icon. Click on the HARDWARE category of properties.
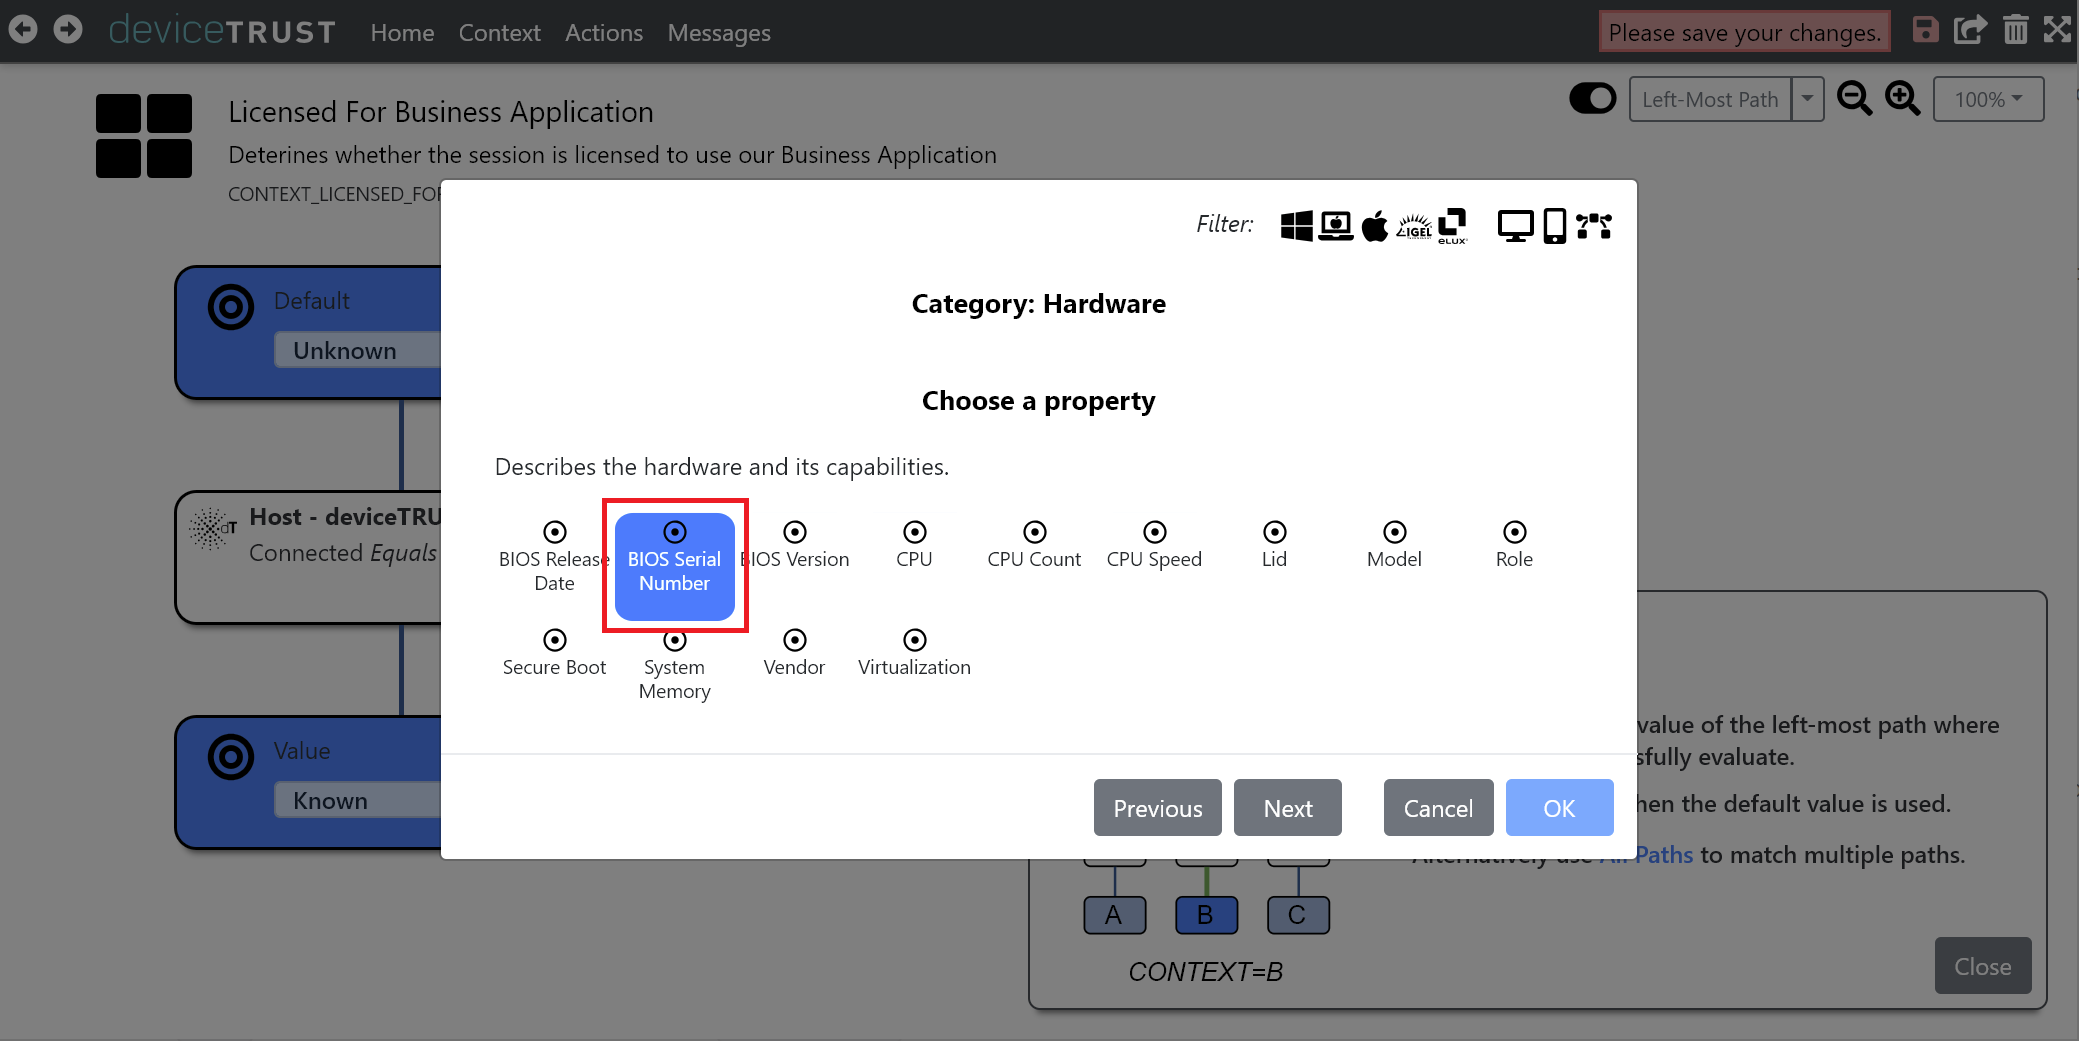
Choose BIOS SERIAL NUMBER from the list of available hardware properties.
Select DEVICE to ensure that the condition is applied against the BIOS serial number of the remote device, and enter the BIOS serial numbers of one or more endpoints.
- Comments can be added within condition values by prefixing the comment with the `#` character.
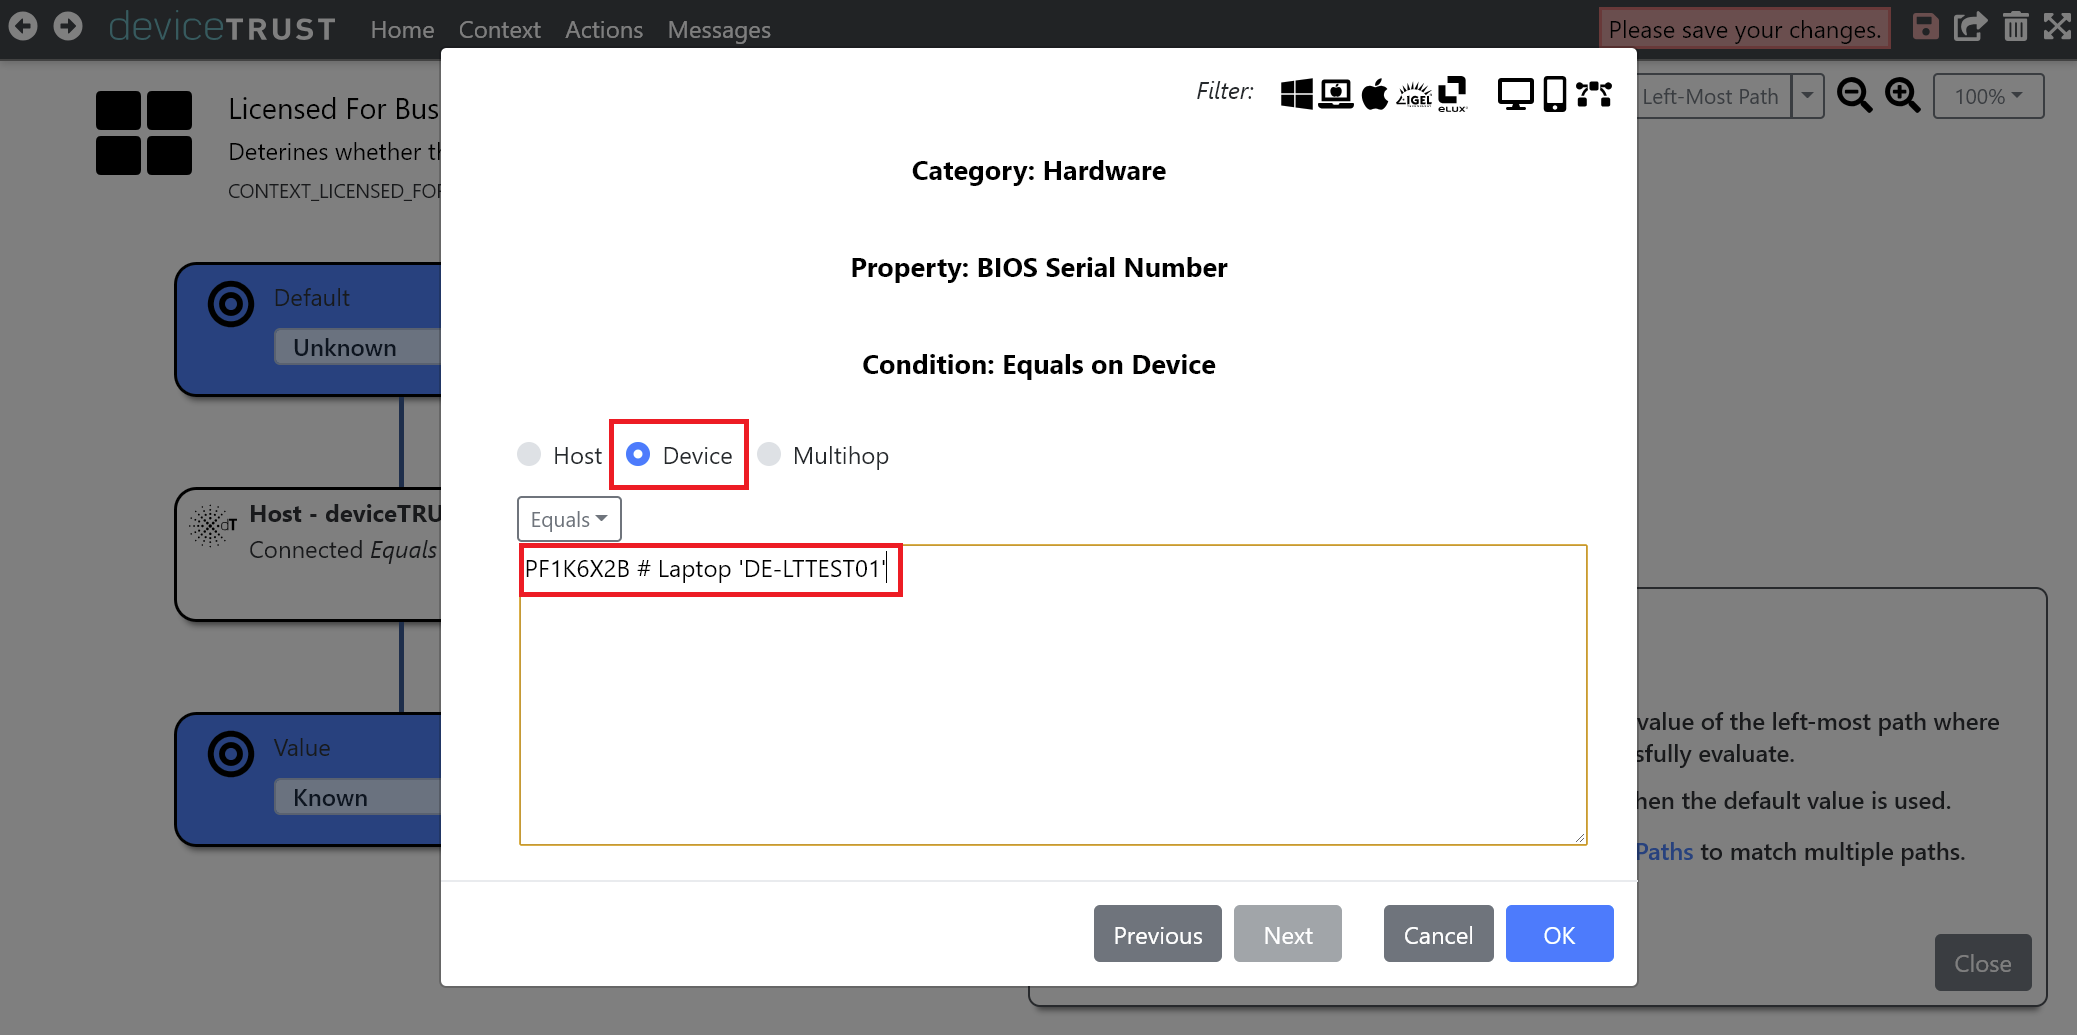
Click on OK to apply the new condition to the context.
Next, change the DEFAULT value of the condition to False and set the VALUE to True. The context will become True when all conditions evaluate successfully.
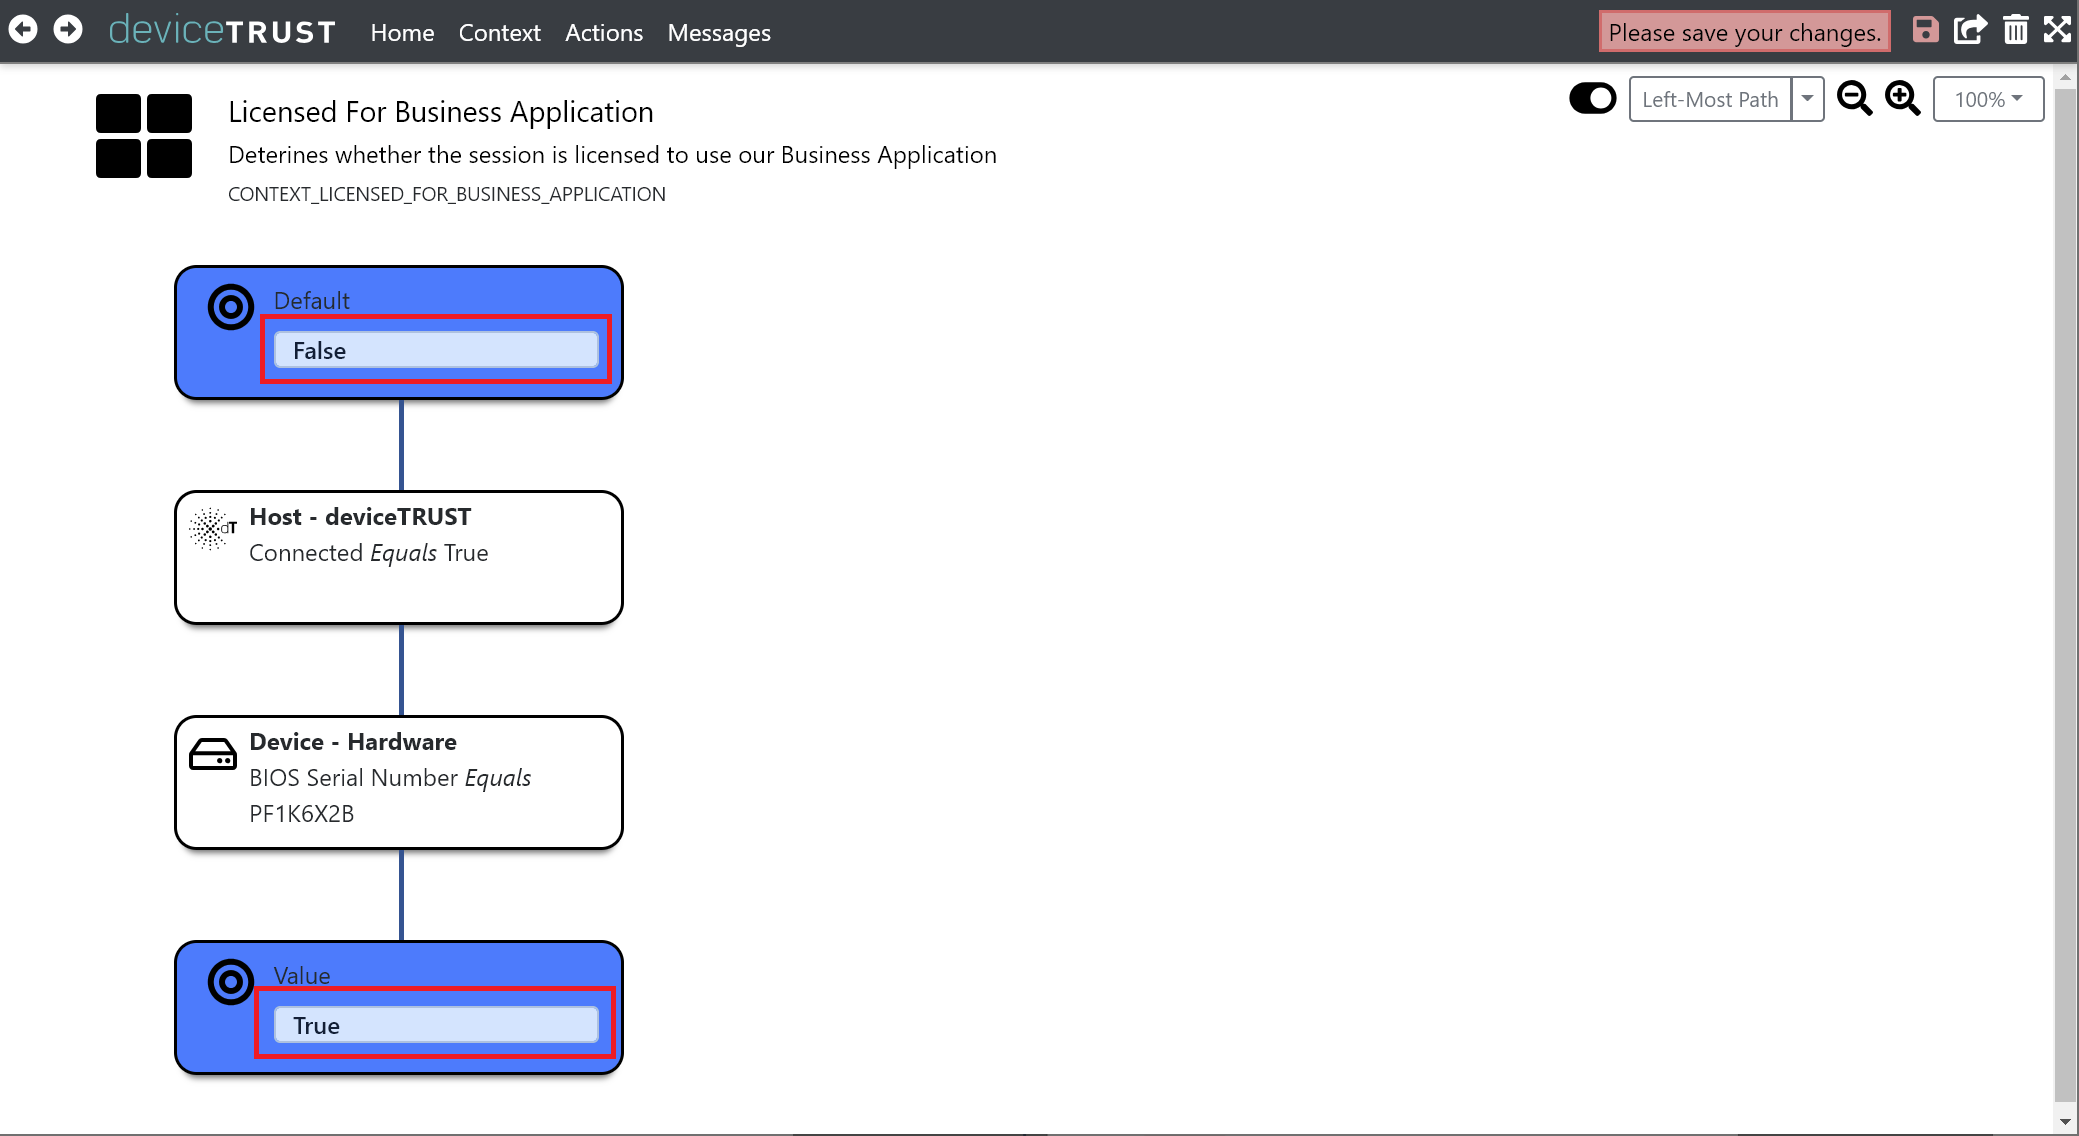
Finally, click the Save button on the navigation bar to commit your changes.
- When deploying configuration using a Group Policy Object, a call to `gpupdate` will be necessary to apply the new policy.
- Existing user sessions will not get the updated policy until their next logon.
Step 4: Test the ‘Licensed For Business Application’ Context
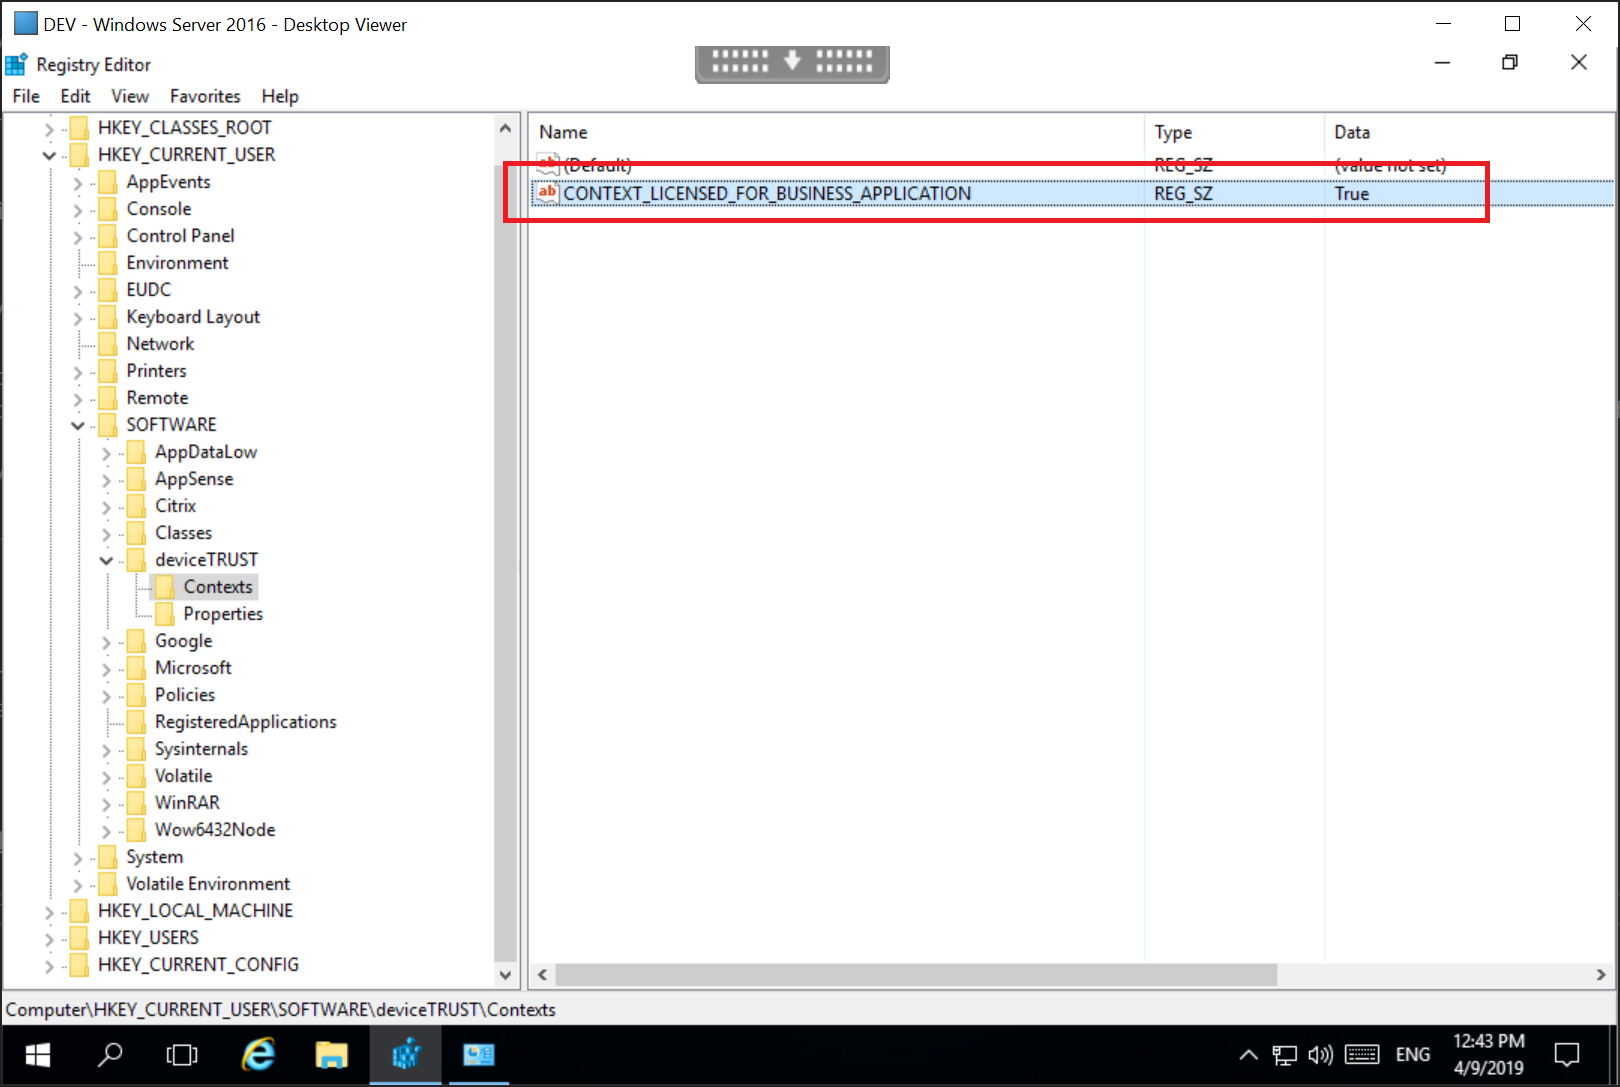
Test the Licensed For Business Application context by remoting into a virtual session and viewing the value of the context within the HKEY_CURRENT_USER\SOFTWARE\deviceTRUST\Contexts registry key.
Accessing the virtual session from an endpoint with a matching BIOS Serial Number will result in a context value of True. All other machines will have the context value False.
Step 5: Create an ‘Application Control For Business Application’ Action
We will build a new action which denies access to the business application (for demonstration purposes, we will use Notepad++) when the Licensed For Business Application context is False.
Within the deviceTRUST Console, click on ACTION within the navigation bar, and then click on CREATE NEW ACTION.
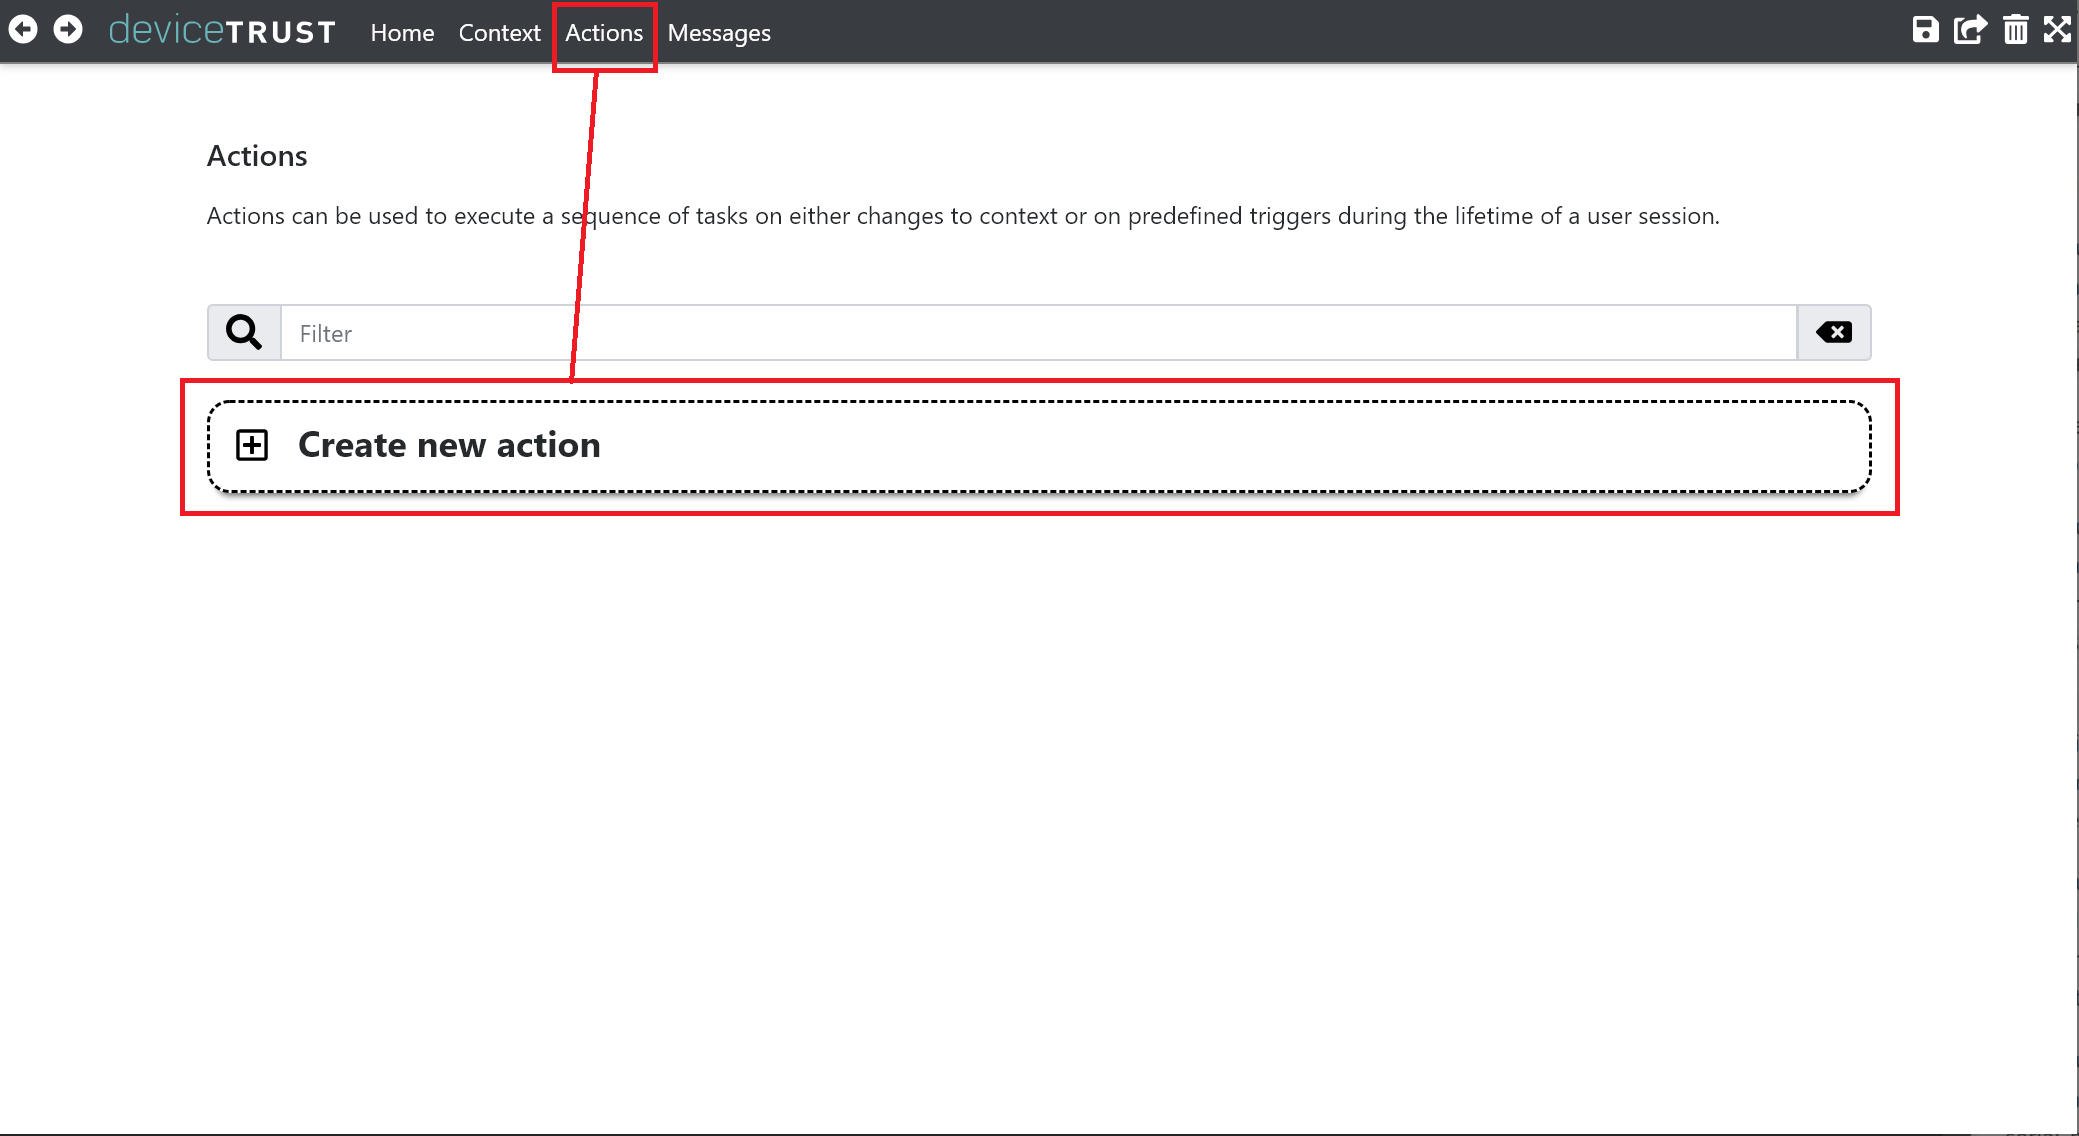
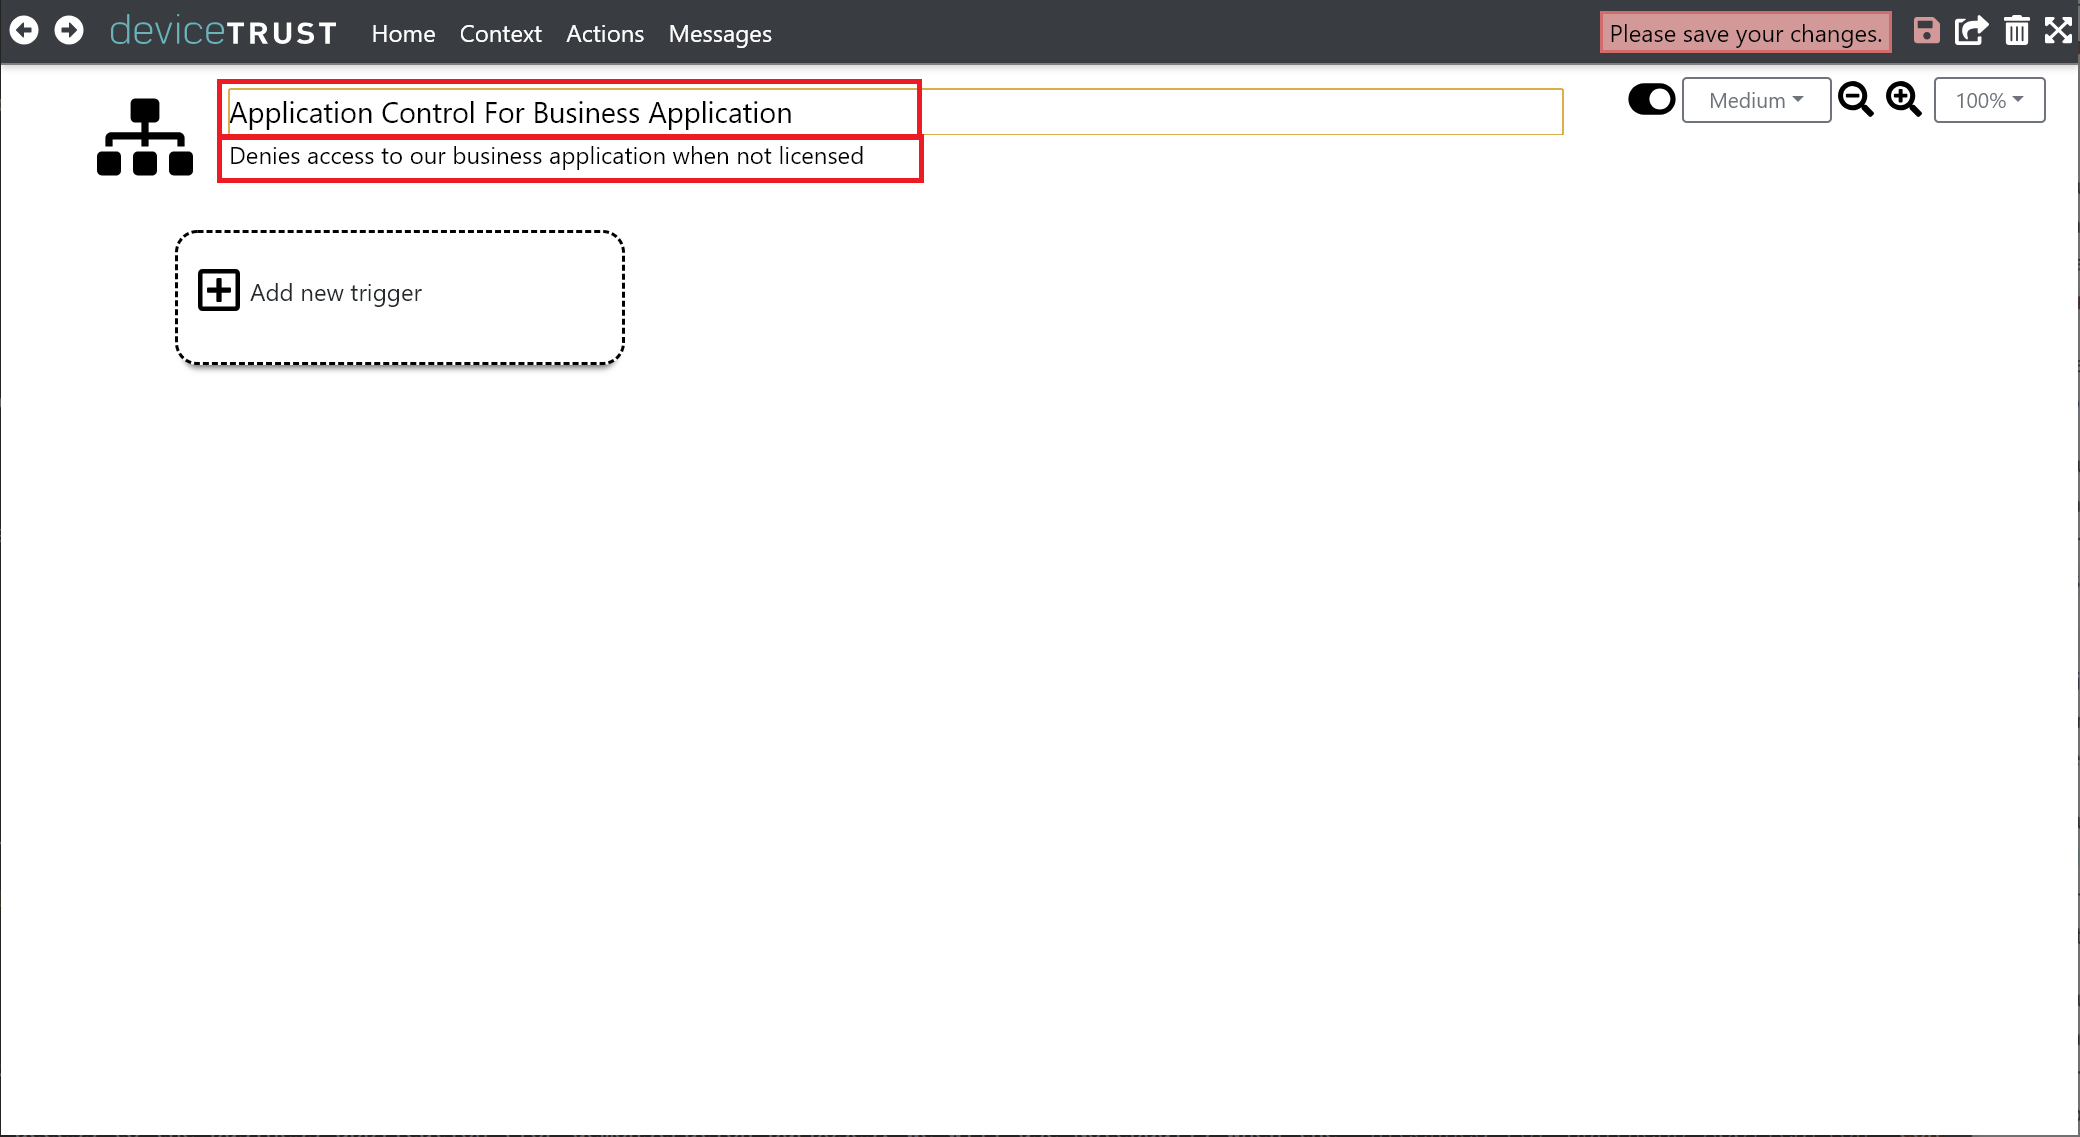
Name the action Application Control For Business Application and provide a description.
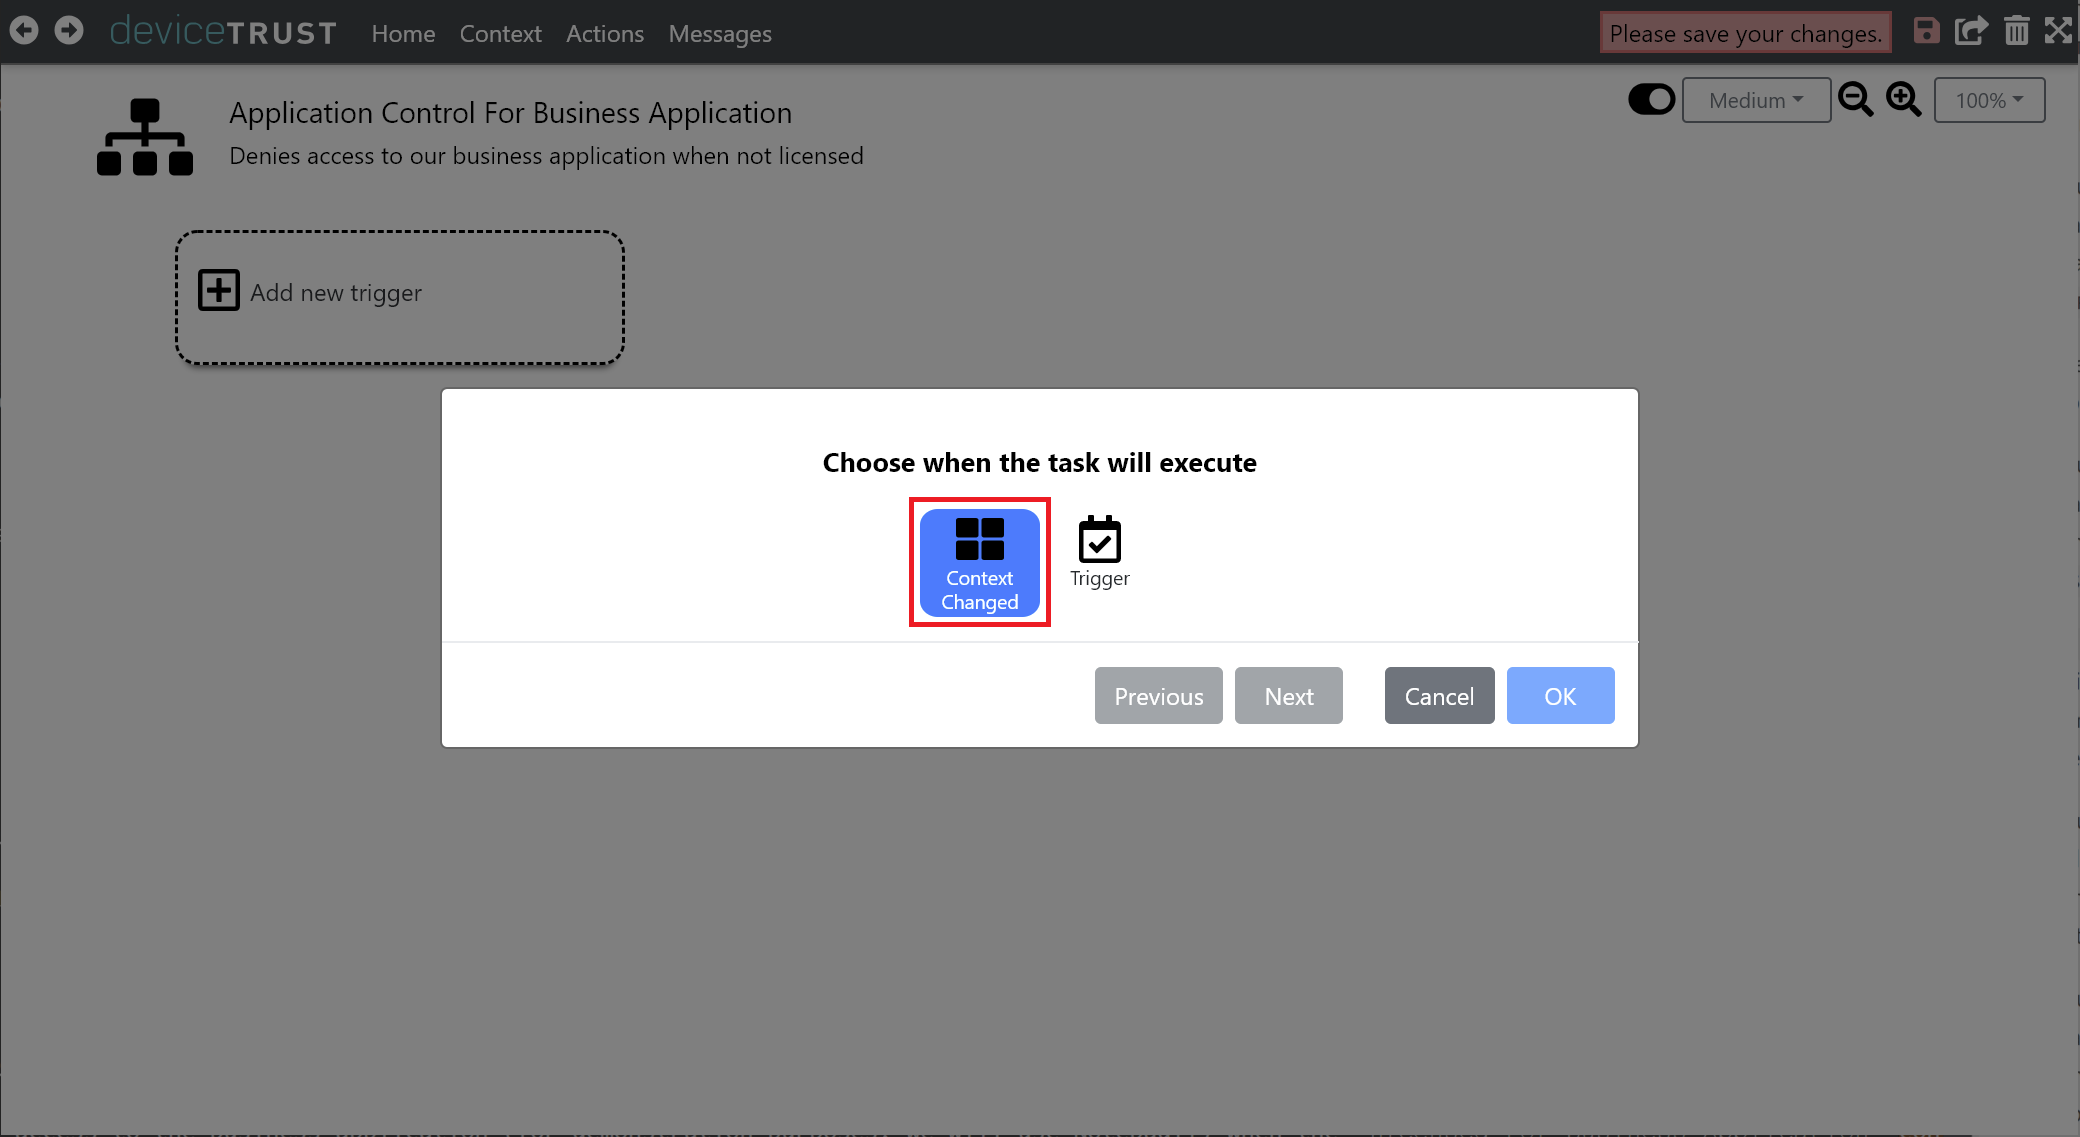
Triggers occur at specific times within the user logon session, or whenever the value of a context changes. Click ADD A NEW TRIGGER and select CONTEXT CHANGED to handle a change in the value of a context.
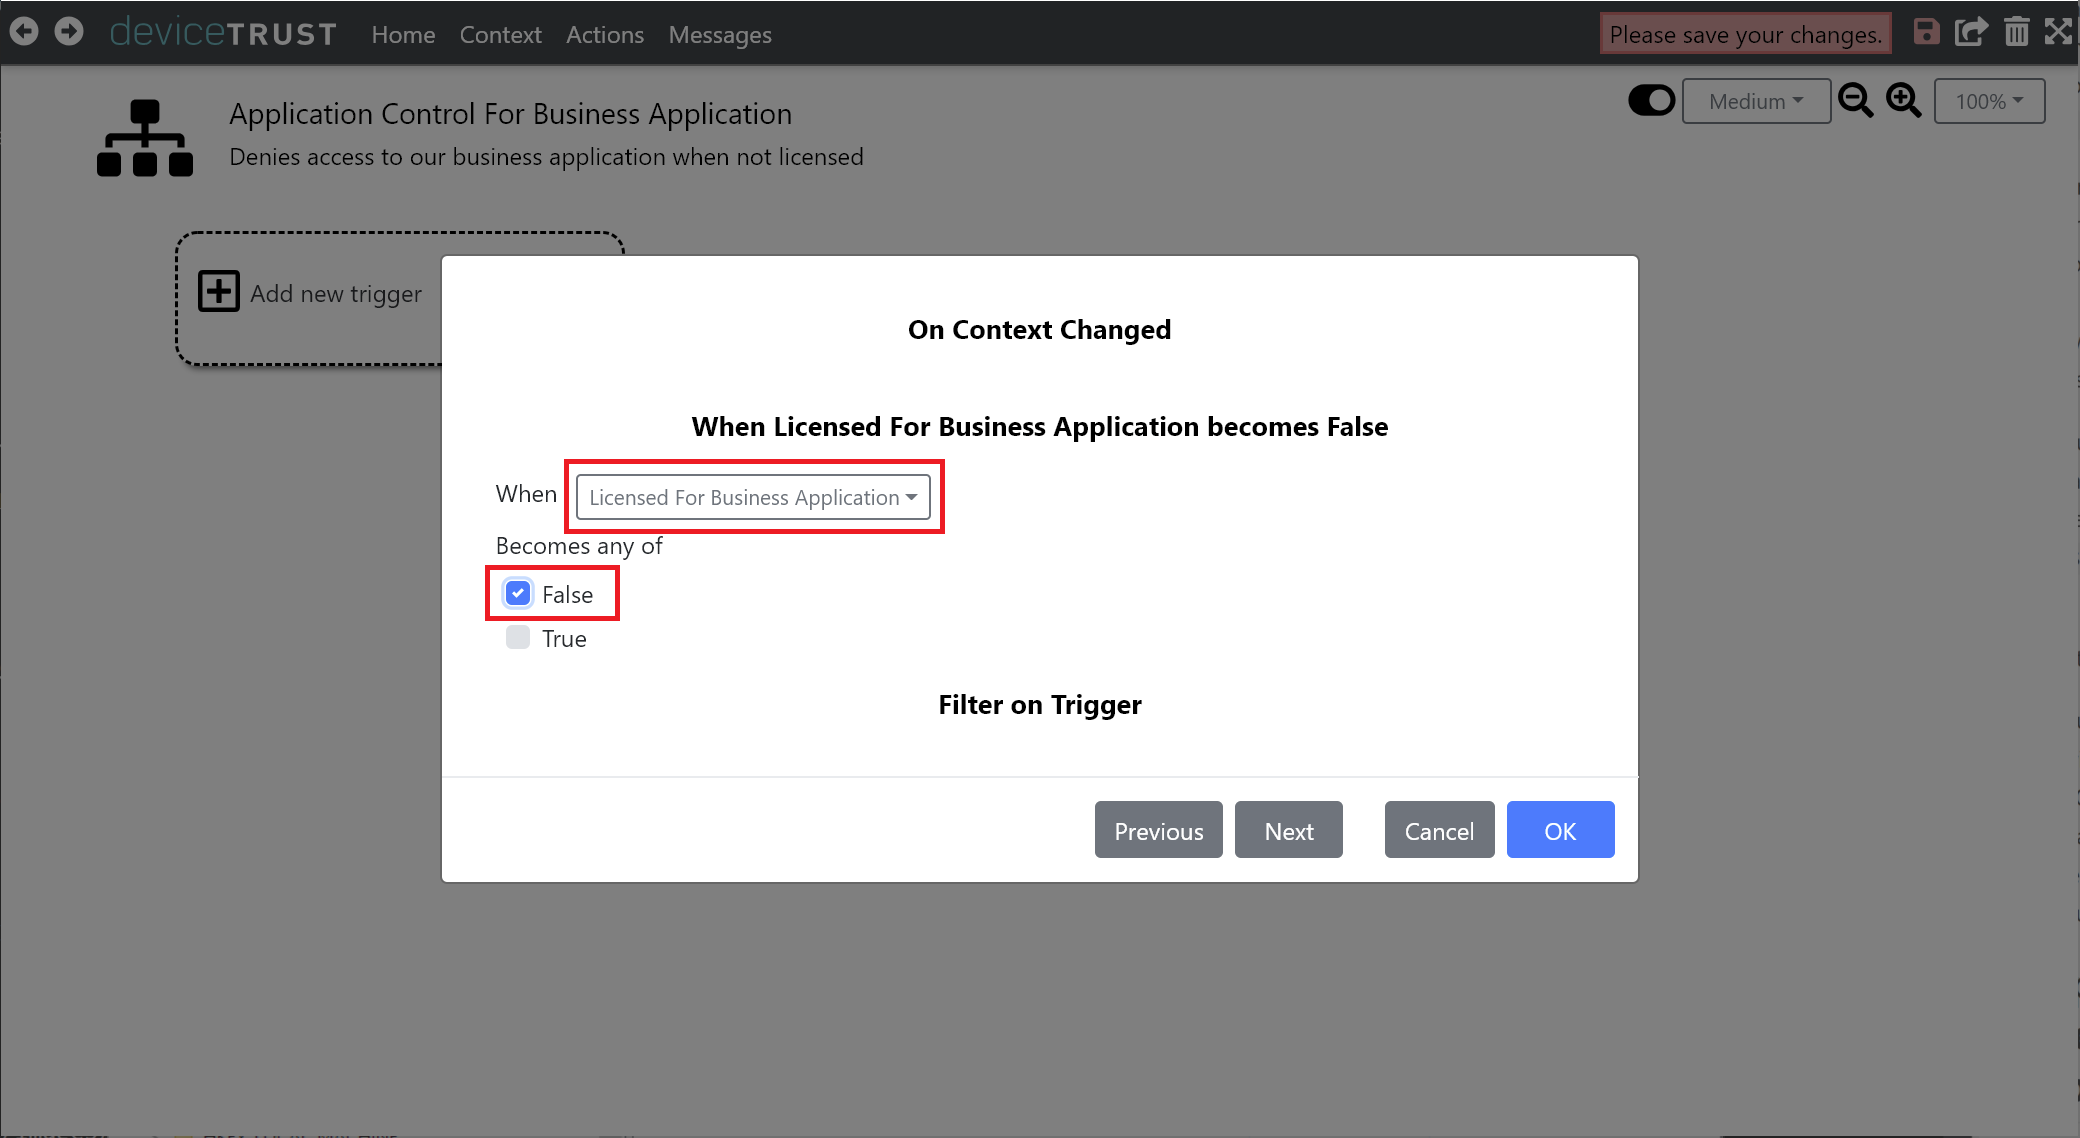
Select the LICENSED FOR BUSINESS APPLICATION context within the dropdown, and check FALSE to take action when the context becomes this value. Click OK to add this new trigger to the context.
We are now able to launch tasks whenever the value of the context becomes FALSE. Click on ADD NEW TASK and select APPLOCKER to create a Microsoft AppLocker rule.

Choose DENY ACCESS TO AN APPLICATION and click NEXT.

The AppLocker task requires a full path to the application to be specified. Using the support for wildcards, enter the path of *\notepad++.exe and ensure that EXECUTABLE is selected from the dropdown.
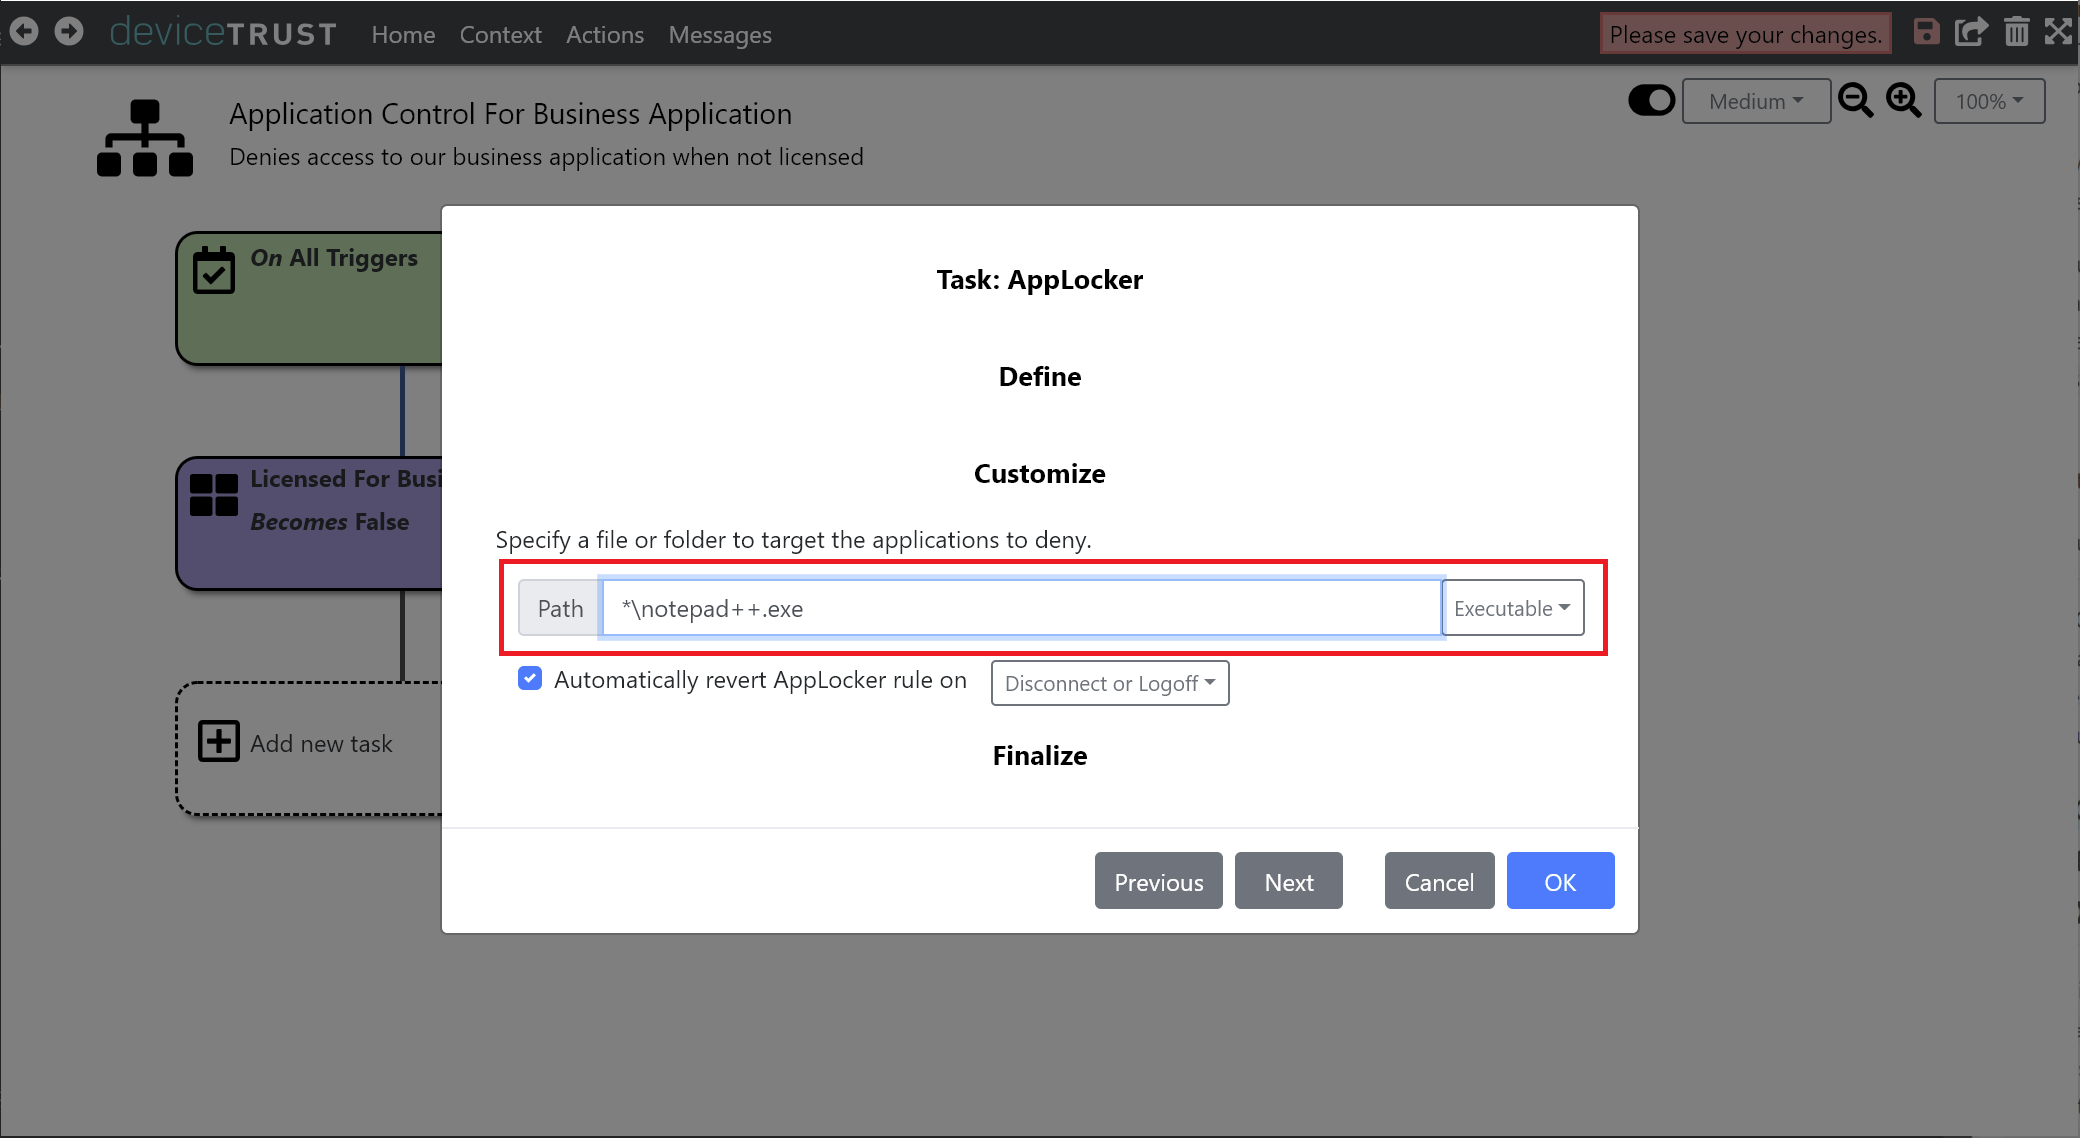
Click on OK to add the task to the sequence of tasks that will execute when the LICENSED FOR BUSINESS APPLICATION context becomes FALSE.
Finally, click the SAVE button on the navigation bar to commit your changes.
- When deploying configuration using a Group Policy Object, a call to `gpupdate` will be necessary to apply the new policy.
- Existing user sessions will not get the updated policy until their next logon.
Step 6: Test the ‘Application Control For Business Application’ Action
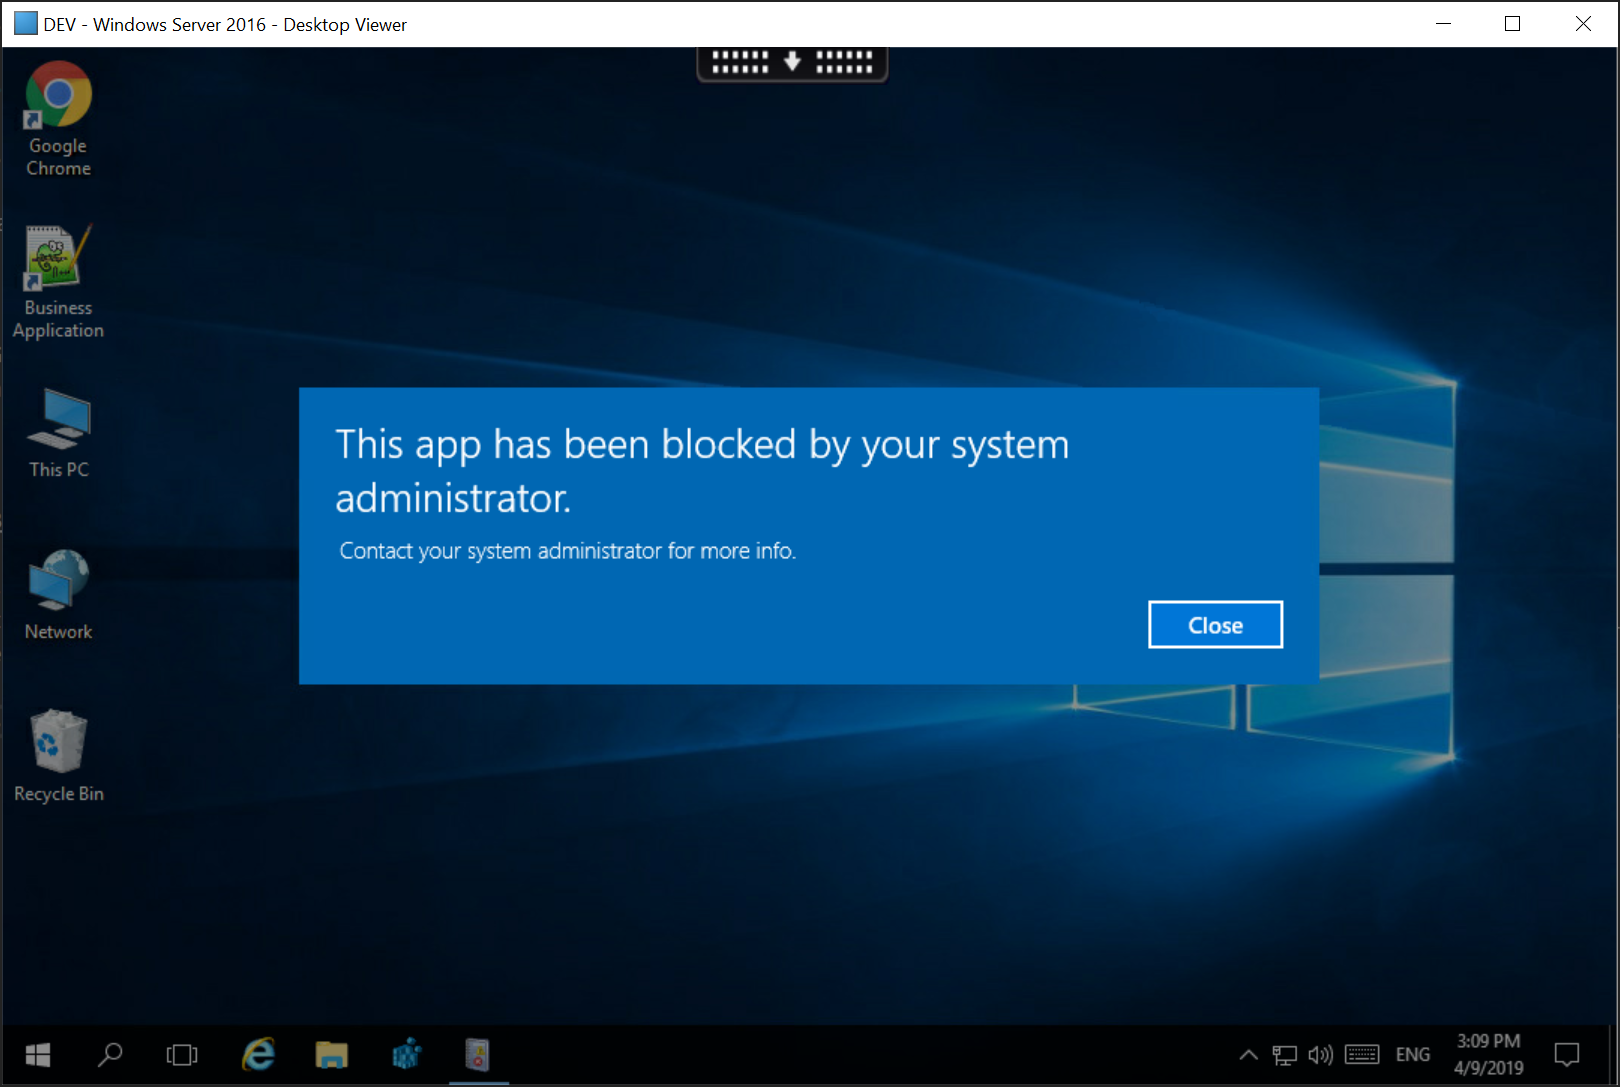
Test the Application Control For Business Application context by remoting into a virtual session and attempting to launch the business application.
Accessing the virtual session from an endpoint with a BIOS Serial Number that matches those defined in the Licensed For Business Application context will allow the business application to execute.
Accessing the virtual session from any other endpoint will result in an error message.
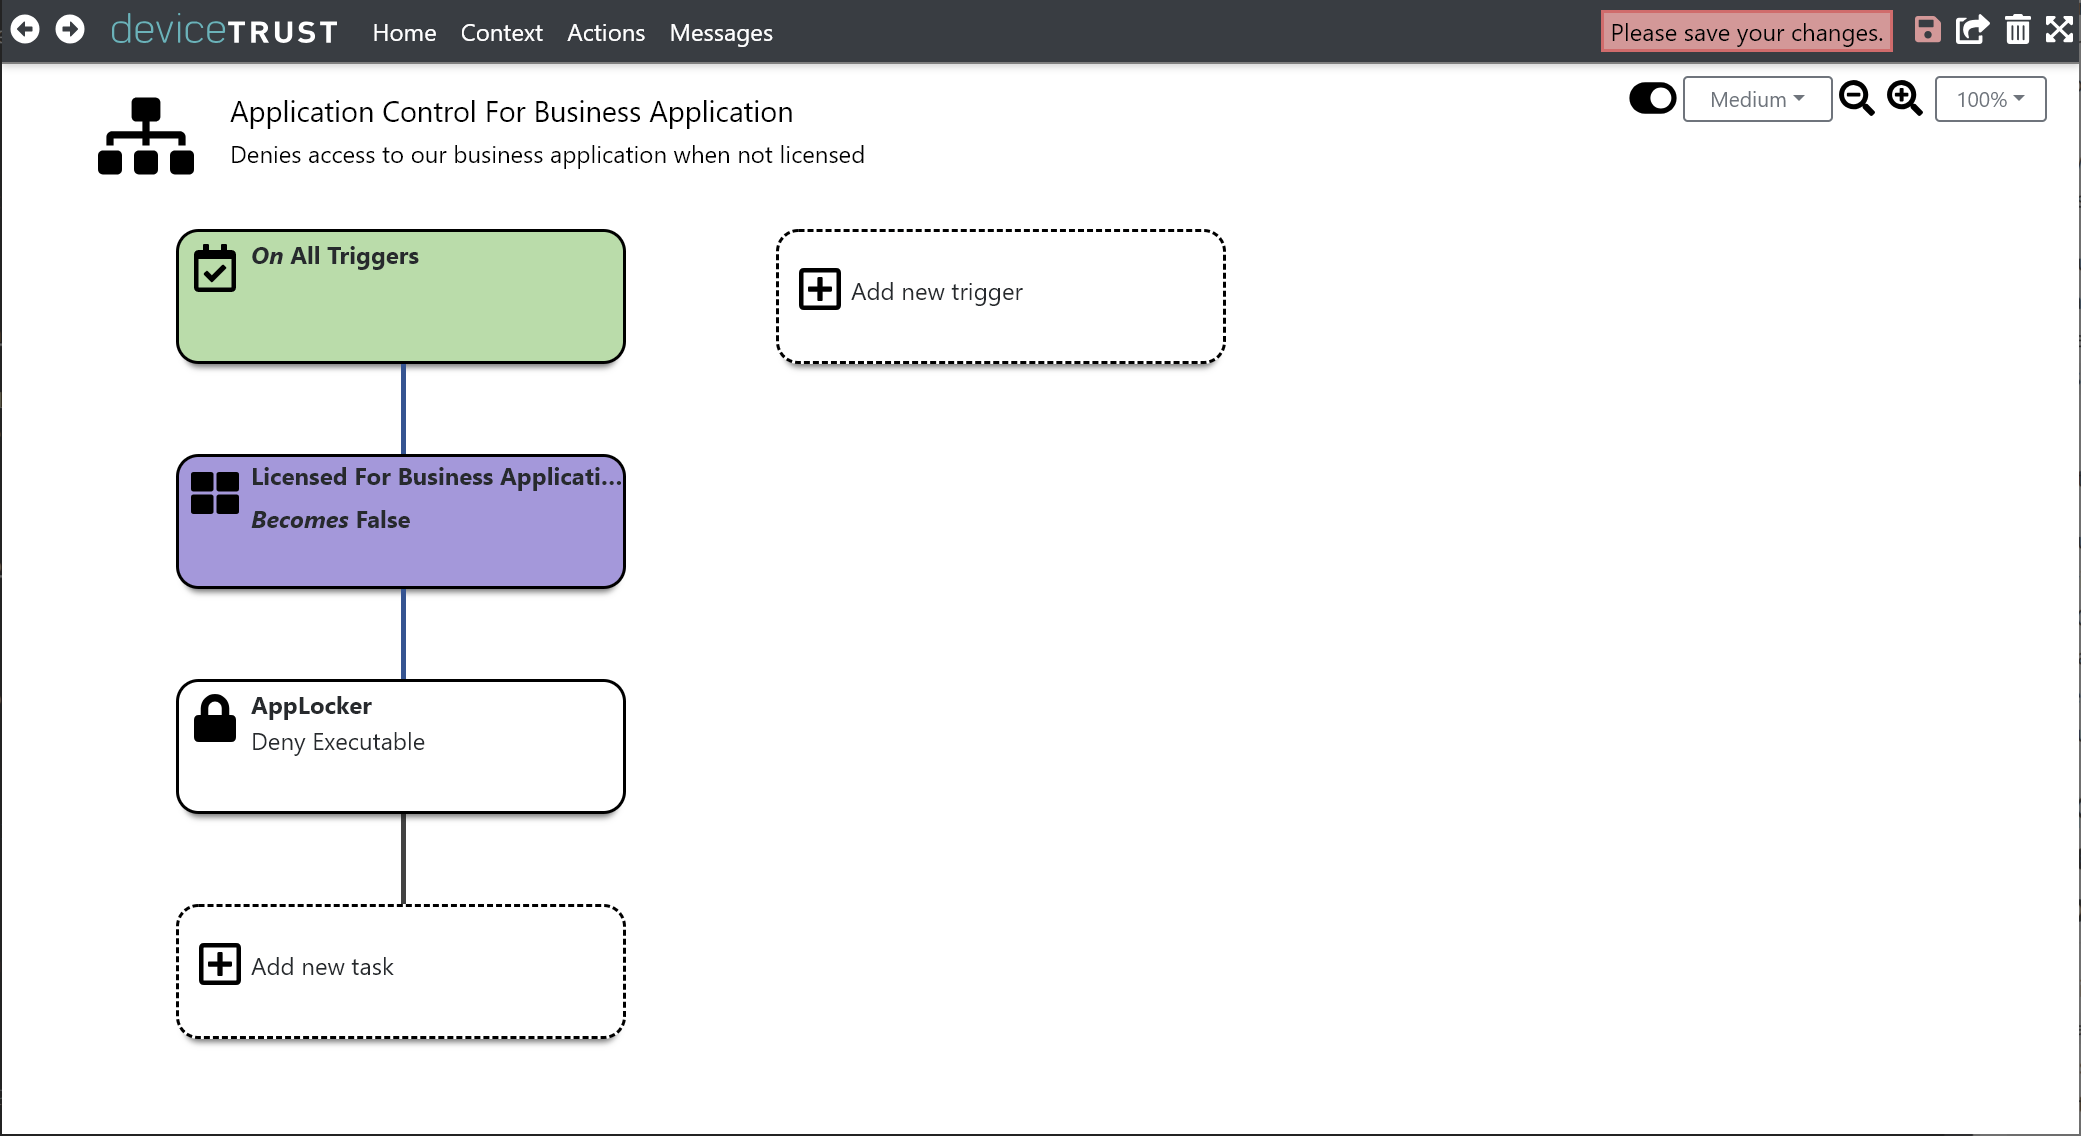
Step 7: Gracefully Terminating Business Application on Reconnect
Our current action will now successfully prevent the launching of our business application from unlicensed endpoints. However, the business application can still be launched
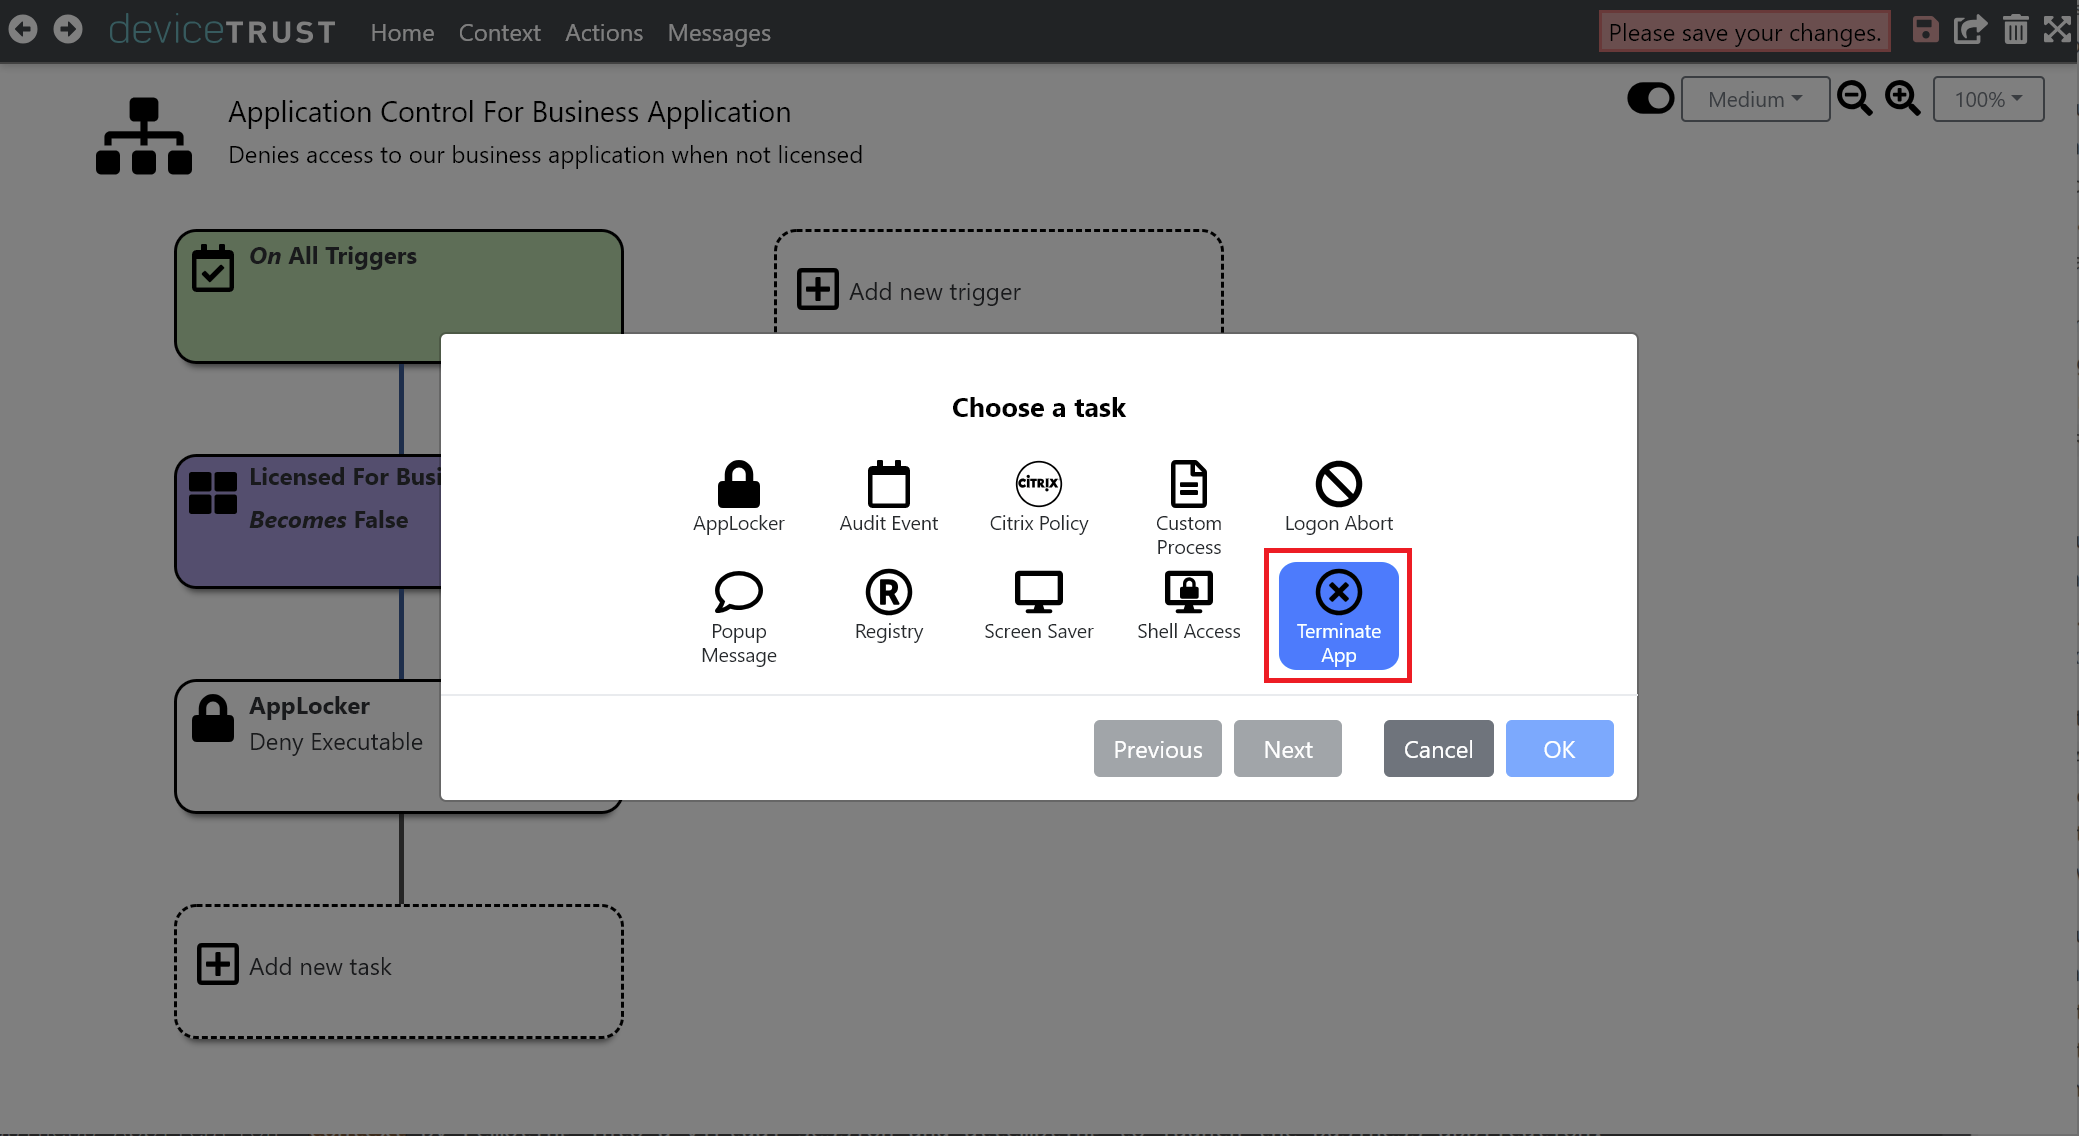
from a licensed endpoint, and then used following a reconnection from an unlicensed endpoint. To solve this, we can use the TERMINATE APP task to gracefully terminate.
Underneath the APPLOCKER - DENY EXECUTABLE task, click ADD NEW TASK and select TERMINATE APP.
Click on IDENTIFY APPLICATIONS BY APPLOCKER POLICIES to use the current AppLocker policies to identify the applications to terminate. Provide a suitable TITLE and MESSAGE to display to the logged on user.
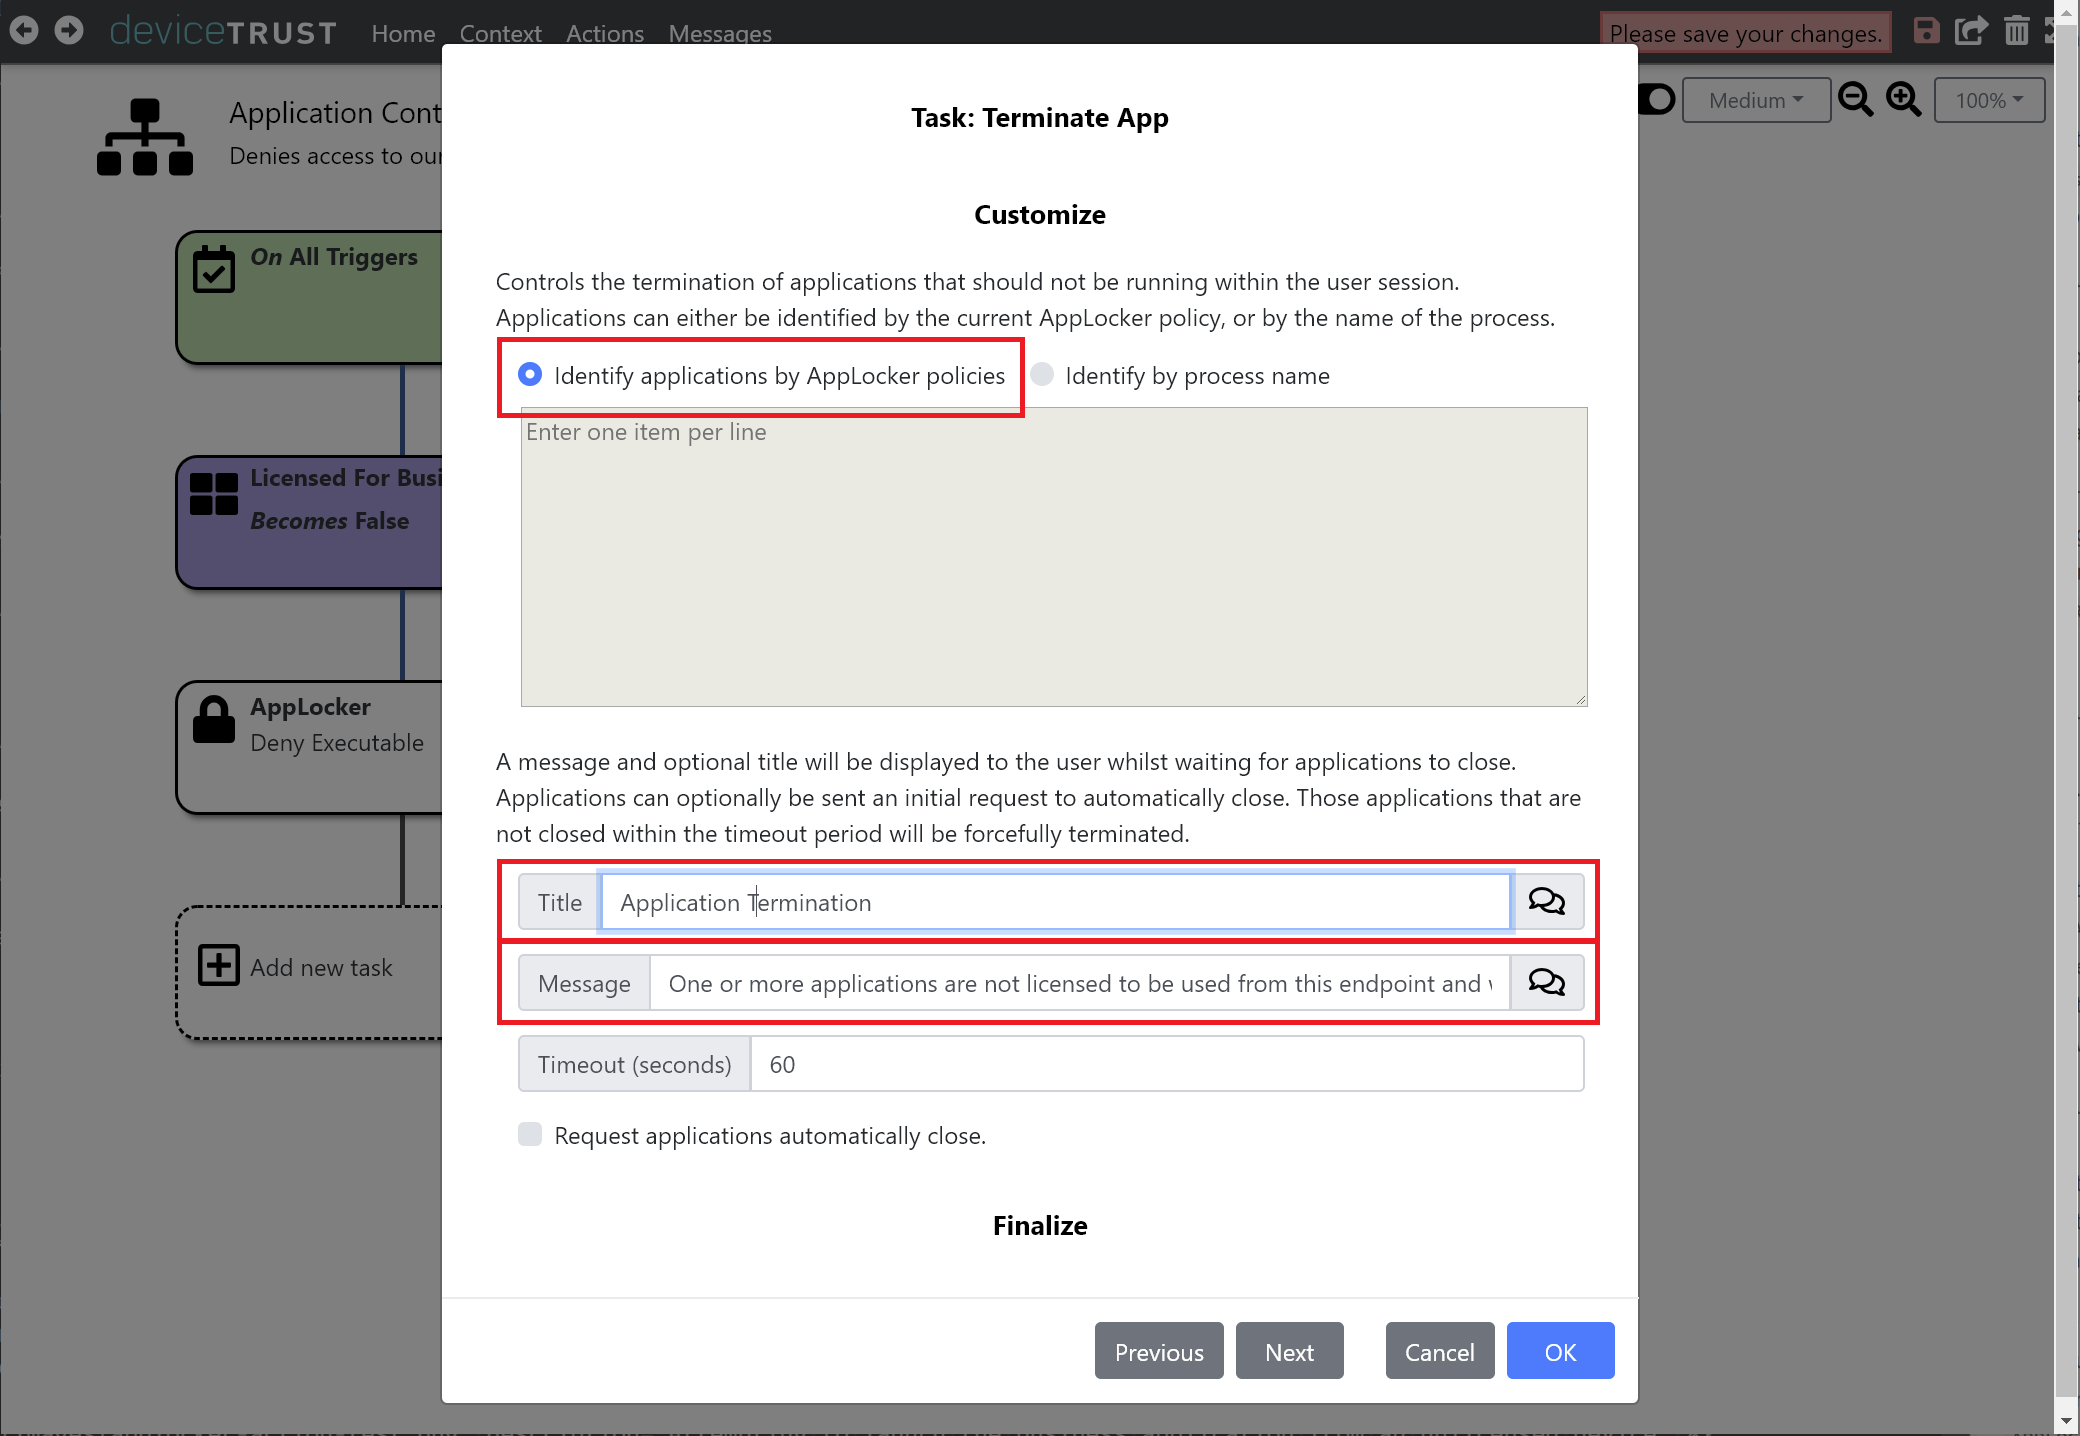
Click on OK to add the task to the sequence of tasks that will execute when the LICENSED FOR BUSINESS APPLICATION context becomes FALSE.
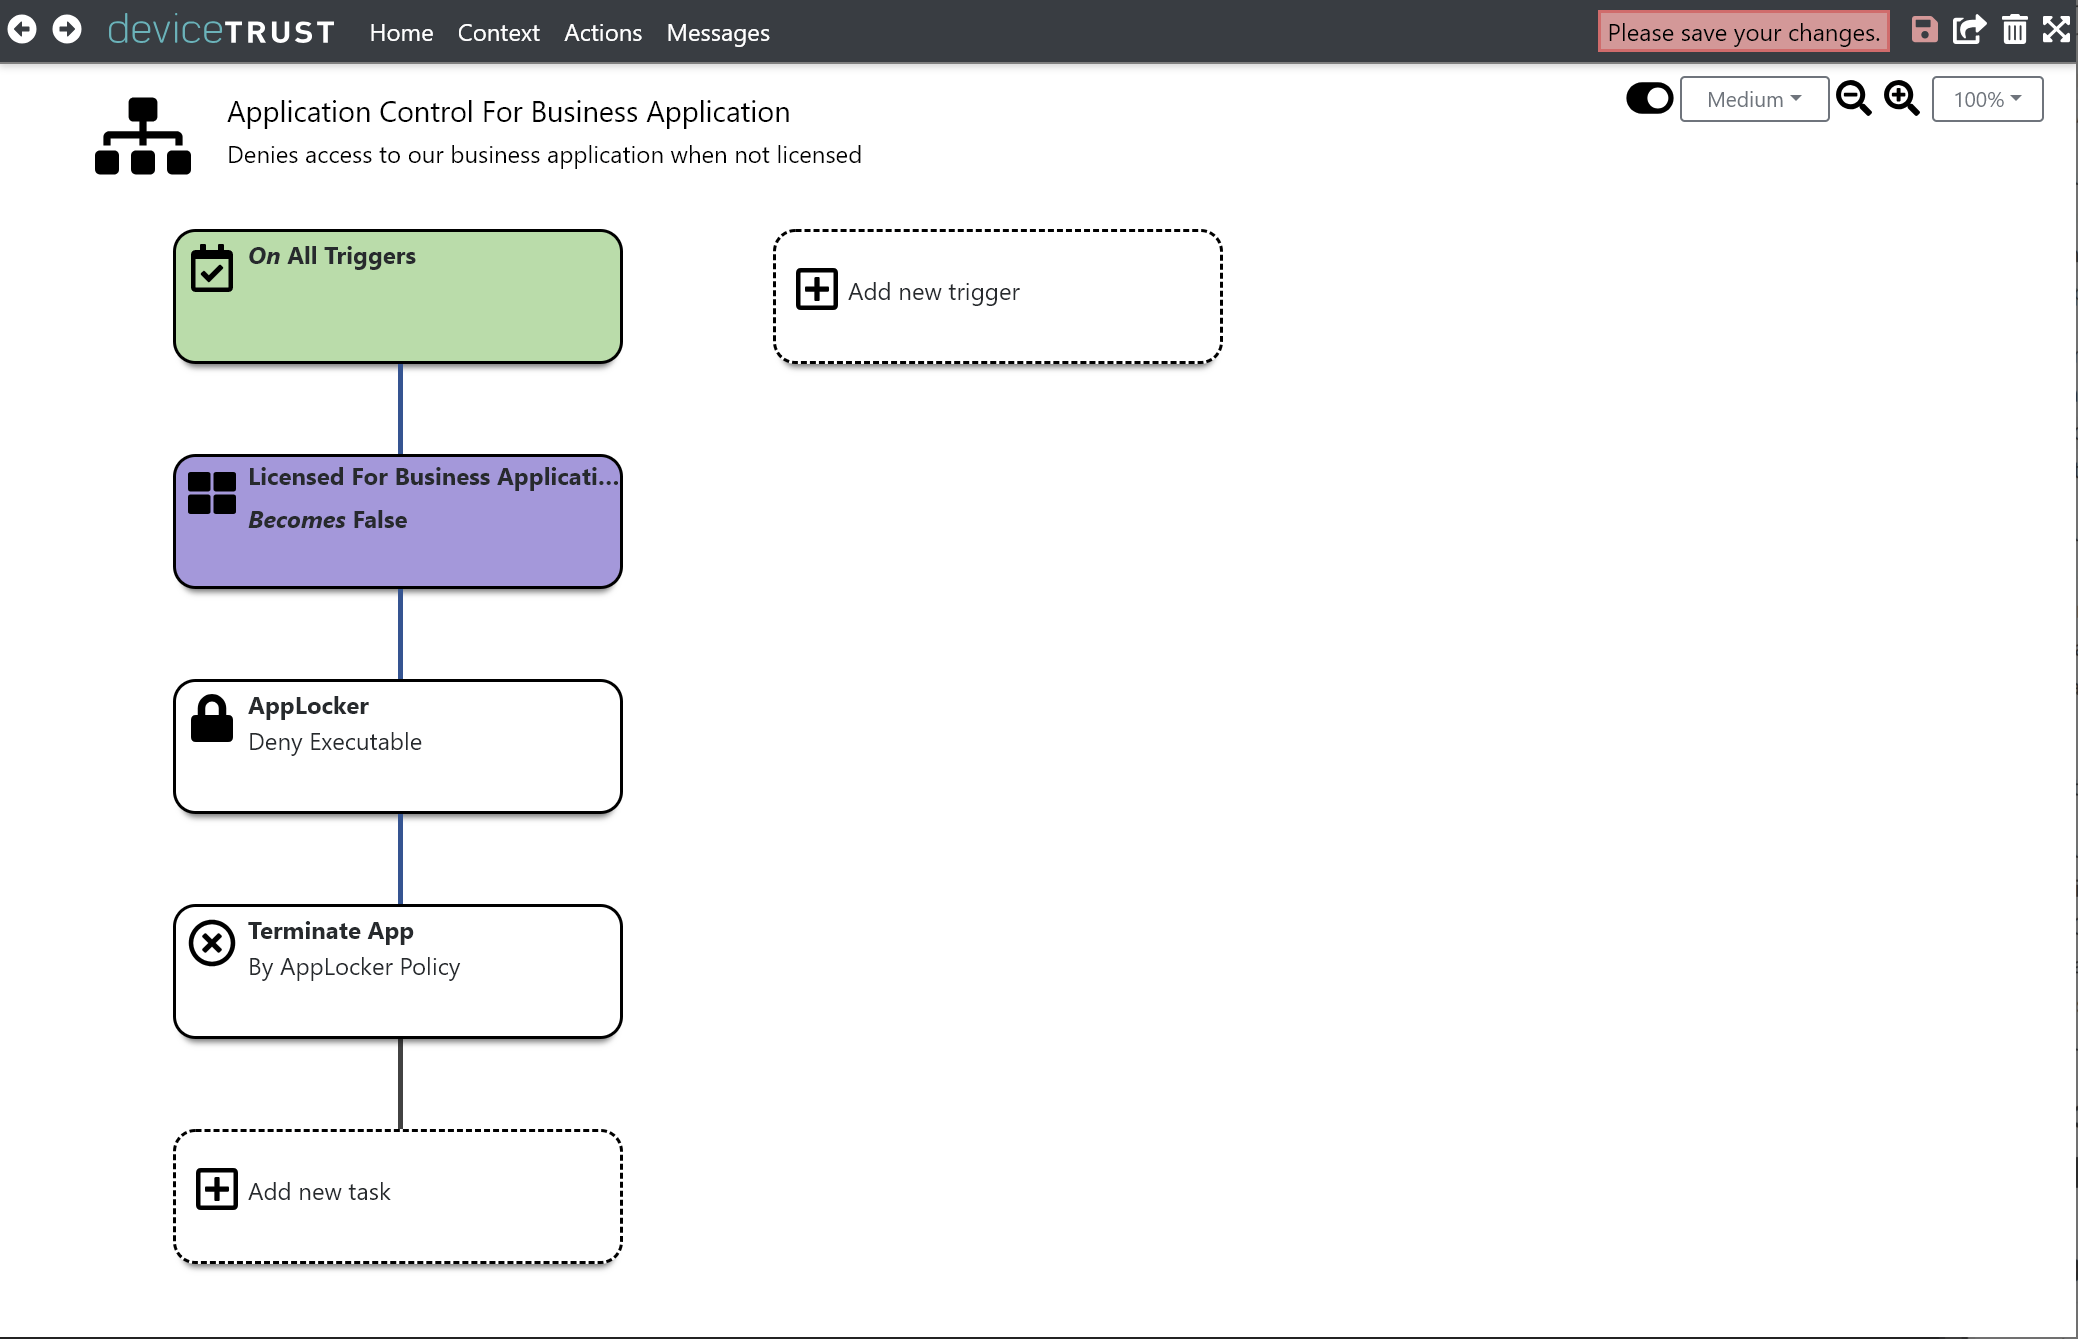
Finally, click the SAVE button on the navigation bar to commit your changes.
- When deploying configuration using a Group Policy Object, a call to `gpupdate` will be necessary to apply the new policy.
- Existing user sessions will not get the updated policy until their next logon.
Step 8: Test the Graceful Termination of Business Application on Reconnect
Test the updated Application Control For Business Application context by remoting into a virtual session from a licensed endpoint.
Launch the business application and leave running whilst reconnecting from an unlicensed endpoint.
deviceTRUST will gracefully terminate the application.
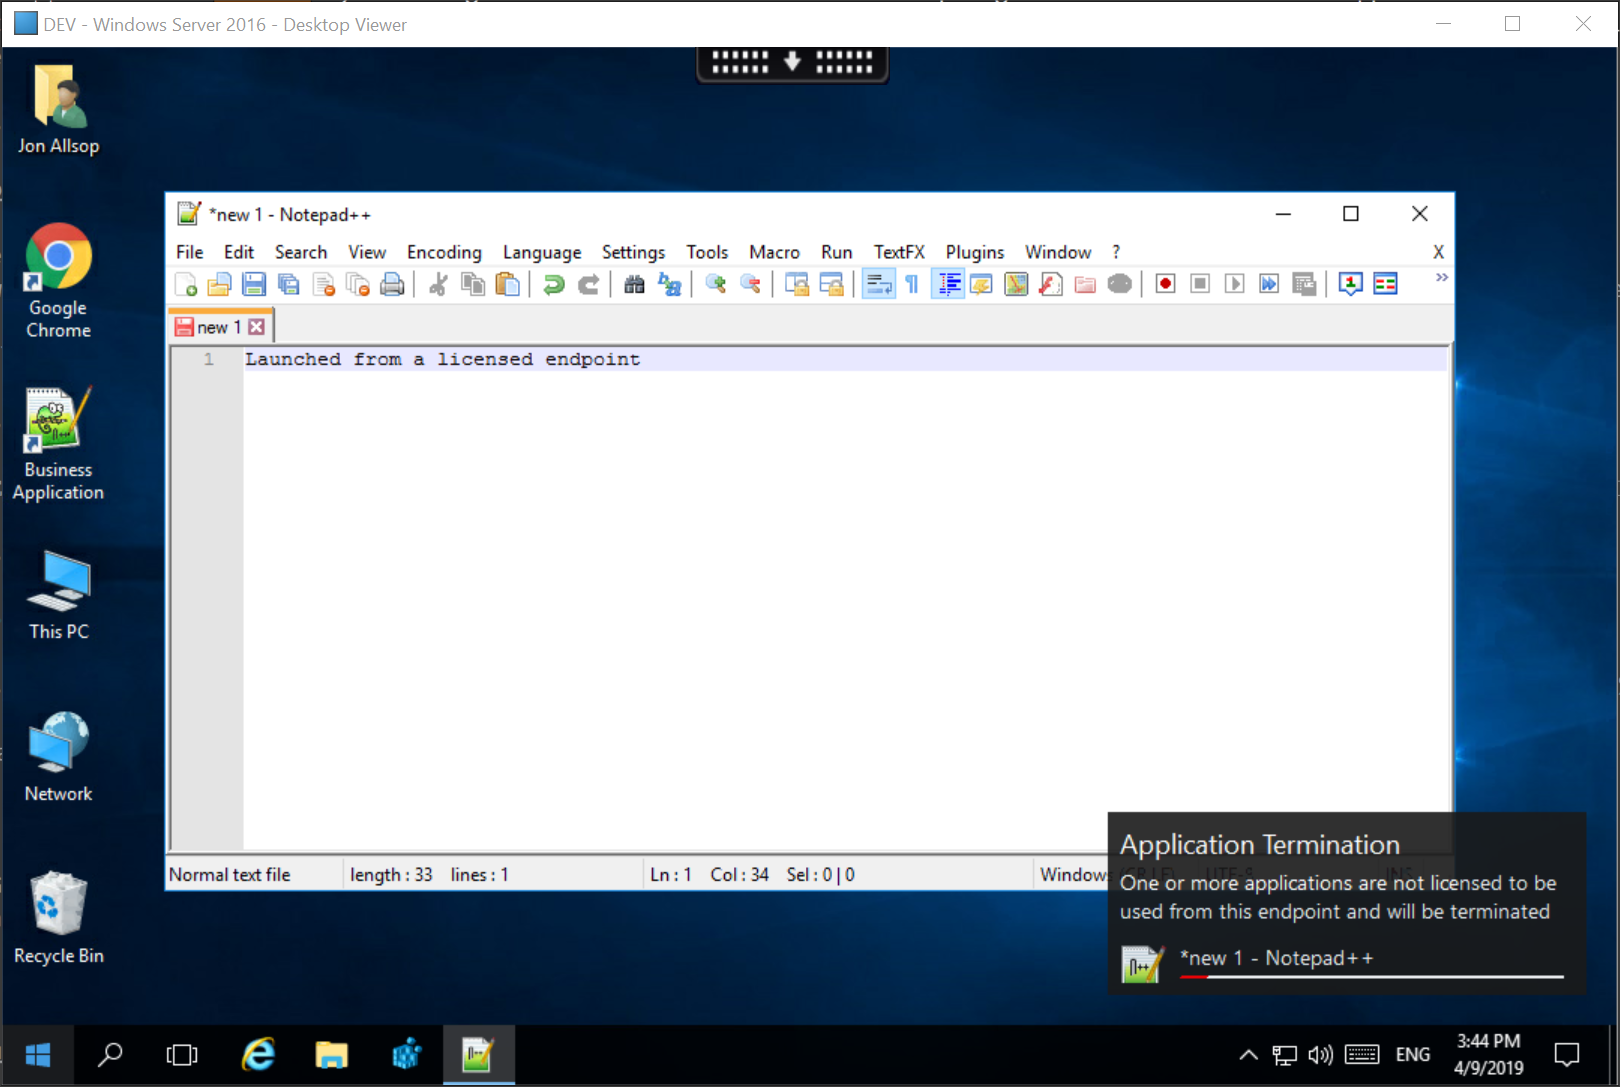
After the timeout period defined within the Terminate App configuration, the business application will be terminated.